Tuesday, February 17, 2015

Watering Can Garden Art


I'm with you, I'm ready for spring. This cold, snow, and ice business is for the birds. Not my birds though, they hate it too. We accumulated 6-8 inches of snow Sunday night and my chickens refuse to leave their coop. I can't say I blame them, I wouldn't want my bare tootsies in the snow either! Here in Southern Illinois we've been teased with warm weather a few times, then we're quickly reminded that it is in fact still winter. Boo. So I'm getting some pretty serious cabin fever and I'm longing to get my hands in my garden. We've moved to a whole new farm since my last post back in August, so I have lots of planning, constructing, and decorating to get done. I like a cute garden, can you blame me?

I was perusing the back alleys of Pinterest when I found a picture of a watering can turned garden art. Too cute! The post didn't come with detailed instructions (really neither does mine), but I figured it out. And I know you can, too!

I didn't have a metal watering can lying around so I did have to purchase one from our local feed store. No biggy. But I did have wire and a necklace I've never once worn hanging out in the house. I took the necklace apart and got to work. Working with the wire, I fed it through the holes of the watering can into the water reservoir and attached a bead at each end, making sure to twist the wire tight to secure the bead. Then I pulled the wire back through the watering spout until I met resistance. I then attached a bead onto the free strand of wire about every inch. You can make each bead closer or further apart, depending on your supply. I twisted the wire underneath each added bead to secure it in place. To finish a strand I would simply wrap the wire around the end bead and twist to close like you would a bread tie.

Voila! See? Super simple stuff and it makes for a delightful, whimsical piece of garden art!

Thursday, February 20, 2014

DIY Farm Sign Using Any Font


Our new place has tons of random pieces of wood lying around in the barn. I knew once I stacked them up that they'd be getting a few coats of paint, some distressing, and would adorn random places throughout our farm. I've made a few wooden hand painted signs before, but drawing out the lettering myself takes FOREVER. I draw it out on the sign, realize its off center, or crooked... then I have to erase all of my hard work. Total bummer. The idea struck me the other day to try something a little different, and it worked out perfectly!

Supplies Needed:
Piece of Wood, cut to size
Sawtooth Picture Hanger
Acrylic Paint (I used Indoor and sealed it with a clear coat)
Wax
Sand Paper
Clear Coat Spray Paint (I used Rustoleum)
Printer
Printer Paper
Paint Brushes
Pen

Apply a dark coat of paint only around the edges of the board, and wherever you want the dark paint to show through in the distressing. One coat should do. Once dry, coat painted edges of wood (and any other areas you painted dark) with a thin layer of wax. Apply two coats of light colored paint on entire board, drying in between. Using sandpaper, sand down edges of board, and any other wax coated areas until the darker paint shows through. Continue distressing until you get your desired effect.

Now for the exciting part - the lettering!

I downloaded a few fonts I liked, measured the piece of wood I was using, and how big of an area I wanted the lettering to cover, and printed out the words and my chicken symbol sized accordingly. To save my beloved black ink, I printed in a light pink color. Cut the words out, and place them wherever you want the wording to go on your sign. Applying pressure, trace over the words - you'll notice there will be an indent where you were tracing.

To make it easier to see when painting, outline the indent of your letters or symbols with your pen.


Finally, paint the outlined letters and symbols. I did two coats of black paint for the letters. Then finished off the entire sign with a coat of clear coat, and attached a sawtooth picture hanger to the back . How easy was that?!

Have fun making a sign for everything in your yard! :)

Sunday, January 5, 2014

Canvas Print Upcycle


Have an old canvas print hanging up that you're getting so sick of looking at you could just puke? Well, maybe that's a stretch, but you get me. Its been hanging on the wall for so long, you don't really like the print anymore, but you don't have anything else to replace it.

Yeah, me too. So I created this! 

I don't really have any specific instructions on how to create this same picture; it all happened so fast! I roughly and haphazardly tore chunks of green/blue based scrapbook paper to make the 'changing seasons' background, accordion folded leaf colored paper to produce several tiny leaves with minimal cutting, and free-handed the tree out of several pieces of scrapbook paper. And of course, I used Mod Podge to piece everything together.

Be creative, and make something beautifully unique. 

Thursday, January 2, 2014

Plumping Cinnamon Lip Butter


Yay, more snow. NOT. We got yet another inch of snow last night. This is the most active winter I've seen in quite a while. I couldn't be less excited about it. With the intensely cold weather getting worse by the day, my lips are requiring more and more moisture. I have tubes of chapstick, nivea lip balm, and even Burts Bees, yet none of them seem to be cutting it here lately. Chapstick is no longer moisturizing, it just feels like a layer of wax over my lips. Nivea seems to dry them out worse in the long run. And the trusty 'ole Burts Bees leaves a white coloring to my lips, akin to a corpse. Hmm, what to do about this conundrum?

Make my own crazy moisturizing lip butter of course! Lately I've been making all kinds of stuff from scratch: soapcandles, etc. What the heck, might as well give lip butter a go. I'm on a roll, people!

When planning this lip butter out, I knew of three things I wanted in the end product: moisture, tint, and some plumping action. I chose cinnamon as the main essential oil because it acts as a natural lip plumper, and well, its smells lovely. Might as well pack as much of a punch as I can into these tiny tubes. And speaking of packing a punch, making your own lip balms can save you some serious dough in the long run. Especially if you're like me, and you tend to lose one per week.

It's a lot easier to make your own lip butter than you might think. Anyone can do this, I swear!

Plumping Cinnamon Lip Butter
0.9 oz or 26 grams Beeswax
1.6 oz or 47 grams Coconut Oil
0.7 oz or 20 grams Shea Butter
0.8 oz or 23 grams Cocoa Butter
4 drops Vitamin E Oil
Lip Tint Coloring (or an old tube of lipstick)
Cinnamon Bark (Cassia) Essential Oil
Peppermint Essential Oil
Lip Balm Tubes/Pots - this recipe made 18 tubes, and 7 pots
Clear Plastic Pipettes

Combine beeswax, cocoa butter, shea butter, coconut oil, and vitamin E oil in a double boiler, or a make-shift double boiler (canning rings in the bottom of a pot). If you use the method I did, make sure the glass measuring cup doesn't touch the sides of the pot. Melt over medium-low heat. Do not boil, you will ruin the butters/oils.

Once melted, turn off heat, add coloring to your liking. It may look dark, but it takes a LOT of color to be visible on the lips once applied. Then add 40 drops of Cinnamon Bark (Cassia) Oil, and 25 drops of Peppermint Oil. Stir.

Working quickly with the clear plastic pipette, fill tubes/pots. When the butter solidifies in the tube, the center will sink down a bit, top off with any leftover lip butter if desired. Let cool, and enjoy!

Monday, December 30, 2013

Chai Tea Soap


New to soap making? Look here.

Chai Tea Soap
9.6 oz. Olive Oil Pomace
6.4 oz. Coconut Oil
9.6 oz. Vegetable Shortening
6.4 oz. Lard
4.63 oz. Lye
12.16 oz. Distilled Water
2 oz. Chai Fragrance Oil
4 tsp. Ground Chai Tea

Chai tea can be used whole, but its best to grind it up to a course powder.

How to Make Soap


So you've decided you want to make soap, eh? Well good for you! Not only will it cut costs in the long run, but you'll also impress people with your pioneer-esque skills. Pioneers had crock pots, right?

Of all the skills I've taught myself over the past year, soap making is one of my favorites. Its almost as fun as canning. I get such a sense of accomplishment after slaving away in the kitchen all day (just kidding, it takes less than two hours), and finally slicing that first bar of soap from the loaf. A big 'ole hunk of beautiful, clean satisfaction.

This recipe has been tested by my family and approved. Its difficult for me to find a soap that I like as most of the store bought soaps leave my skin itchy afterward - but not this one! Its a very moisturizing bar, and the only soap I'll ever use.

Soap Ingredients:
9.6 oz. Olive Oil Pomace
9.6 oz. Vegetable Shortening (Crisco)
6.4 oz. Coconut Oil
6.4 oz. Lard
4.46 oz. Lye
12. 16 oz. Distilled Water

Optional Ingredients:
1-2 oz. Fragrance Oil
2-4 Tbsp. Natural Coloring (French Green Clay Powder, Bee Pollen Powder, etc)
2 Tbsp. Herbs (Spearmint Leaves, Rosemary, etc.)

Equipment Needed:
Crock Pot (Designated solely for soap making)
Stick Blender (designated solely for soap making)
Wooden Spoon (designated solely for soap making)
Digital Scale
Nitrite Gloves
Eye Protection
Glass Measuring Cup
Various Plastic Bowls
Plastic Spoon

Caution: Lye is a caustic substance. Its best to keep pets and children away from wherever you intend to work with lye, and out of the kitchen during the soap making process. Always wear gloves, and goggles when working with lye until it tests non-caustic.

Measure out fats: Olive Oil, Coconut Oil, Vegetable Shortening, and Lard.

Dump in Crock Pot. Set to high, and cook until all the fats are melted to a liquid (20-30 minutes).

Once everything in the crock pot is melted, its time to mix the lye and water. Make sure you're wearing long sleeves, your protective gloves, and have eye protection on. This is critical, as lye can blind you if it gets into your eyes. Don't let that scare you away! Many household cleaners can cause the same damage - just be sure to take necessary precautions.

I take my lye onto the porch to measure and mix it. If you've never used lye before, it comes as tiny beads that have an immense amount of static electricity. The first time I mixed it in my kitchen and the beads went everywhere - bad news if you have children or pets. When mixing lye and water ALWAYS POUR LYE INTO WATER, NEVER WATER INTO LYE. The idea is to dilute the lye when mixing. If you pour water into lye, you'll create a concentrated substance that has the potential to spatter everywhere (i.e. eyes and skin).

Upon pouring and mixing the lye into the water, you'll notice its very cloudy, and gives off a vapor. Do not breath in the vapor, but continue mixing.

After 30-60 seconds, it will clear.

Take lye mixture inside, careful not to spill anywhere, and slowly pour into the crock pot with the melted fats. Using your stick blender, blend contents or about 5 minutes. You'll stop blending when your soap 'traces' - a term used to describe the thickening of the mixture to which a line or 'trace' is visible when the utensil is pulled through the soap. At this point, the mixture should be the consistency of a soft pudding. Place the lid on the crock pot, and cook on LOW. Stay by the crock pot as the soap cooks. The soap will expand and boil over. As it rises, stir it and place the lid back on. Keep a close eye on it.

As the soap cooks, at first it will look similar to apple sauce, then take on more of a waxy appearance. Once it looks like the picture below (about an hour of cooking), its pretty much done.

Test the soaps PH to be sure it is in fact done, and no longer caustic. The strip on the right was my first test, right after combining the materials (obviously I knew it was no where near done but wanted a picture to show for comparison). The strip on the left was taken just before removing the soap from the crock pot and shows that the soap is safe to touch.

Once done, transfer the soap from the crock pot to a plastic bowl. Let sit for a few minutes stirring occasionally. The idea is to cool the soap down as much as you can before it starts to harden. The cooler the soap is before adding the fragrance oil, the more of the scent the soap will retain. Too high of a temp when adding fragrance oil can literally wipe it out entirely leaving no smell.

Add dry additives of your choice. Stir. Add fragrance oil. Stir. Then spoon the soap into the mold of your choice. I like to be as frugal as possible and just use cardboard molds I find around the house. I've also used the bottom portion of cereal boxes with great success. Allow soap to cool at room temperature for at least 8 hours or until completely hardened.

Once it has cooled, slice into bars and its ready to use!

Mistakes I've made when making soap: 
1. Didn't watch the crock pot and the soap boiled over, leaving a gooey, chemical/fat mess all over the counter.
2. After the crock pot boiled over, I had the bright idea to leave the lid off so it wouldn't happen again. Bad idea. The soap dried out before it was able to cook into a neutralized state, and gave off wretched chemical fumes. Had to scrap the whole batch.
3. Didn't mix a dry additive well enough, and once dried the soap bars had clumps of powder in them.  
4. Too many dried herbs in my first batch. A little goes a long way.

Wednesday, December 11, 2013

Maple Spearmint & French Green Clay Soap


I've read about from-scratch soap-making before. Not the melt, and pour soap, I'm talking the scary lye, and lard kind of soap-making. It piqued my interest, but I pushed it to the back of my mind. It sounded way to complicated, and I'd probably burn my skin off. 

Fast forward two years. Here I am, on my farm, with my new-found country homesteader confidence, and another soap making post from my favorite blogger graced my screen. I've taught myself the arts of canning, bread making, cheese making, candle making, sewing, chicken keeping, and wine making, among many other things. Not to mention many personal tribulations that have made me a stronger and more self-sufficient human being. After all that, I knew I could make soap. And as it turns out, its pretty simple. 

There are three methods that I know of for making soap:

One - Melt and pour. Purchase a pre-made block of soap, melt, and throw in your own additives. 
Two - Cold Process. Combine fats, and lye over a heat source. Stir in additives, then pour directly into the mold. Once dry, cut soap, then let 'cure' (to neutralize the lye) for several weeks.
Three - Hot Process, the method I used (and loved). Hot process and cold process start out very similar, but instead of pouring the fat/lye combination into a mold to let cure, the mixture is cooked to neutralize the lye right before your eyes. The soap is safe to use right away, though if a shape is desired, it will need to cool in a mold before cutting into bars. 

The tutorial  and base recipe I used can be found here. This recipe makes two pounds, and 8 standard sized bars. The second best part about making your own soap (first being self-sufficiency) is the cost. If purchased elsewhere, an artisan, quality ingredient soap like this might cost anywhere from $5 to $8 per bar, possibly more. This entire recipe costs around $12 to make, which equals out to ONLY $1.50 PER BAR. That's pretty amazing if ya ask me.

Maple Spearmint & French Green Clay Soap

Soap:
9.6 oz. Crisco
6.4 oz Lard
9.6 oz. Olive Oil Pomace
6.4 oz. Coconut Oil (76 degree melting point)
12.16 oz. Distilled Water
4.463 oz. Lye

Additives:
1 oz. Maple Syrup Fragrance Oil
0.5 oz Spearmint Fragrance Oil
3 Tbsp. French Green Clay Powder
2 Tbsp. Dried Spearmint

Monday, December 9, 2013

Homemade Candles

Candles are great. They make a home warm and inviting; the smell, the glow. We always have two going at opposite ends of our house. I'm a fan of candles that smell of baked goods. Don't get me wrong, I love a house filled with the smell of ACTUAL baked goods, but I can't make pies and cupcakes 24/7. A few weeks ago I decided I wanted to start making soap from scratch. When I started researching soap making suppliers, I noticed many of them also sold candle making supplies. A light bulb when off - why hadn't I thought to make homemade candles, too? So I purchased the supplies I needed for homemade soap (which I'll attempt in a few days), as well as everything I needed to start making homemade candles. They're SO easy, anyone can do it! You can build up your own candle stockpile in your favorite scents (that may be difficult to find in store bought candles), or give them as gifts. Homemade gifts are the best to give (and my personal favorite to get)!


Supplies Needed:
1 lb Candle Wax
1 oz. Fragrance Oil
1 16 oz. OR 2 8 oz. Container for the Candle
Wicks
Wax Adhesive 
Double Boiler OR a Pot, Canning Rings, and a metal container preferably with a spout (see below)

Put a dab of Tacky Wax on the bottom of the metal wick base. 

Adhere the wicks to the bottom of your chosen candle containers.

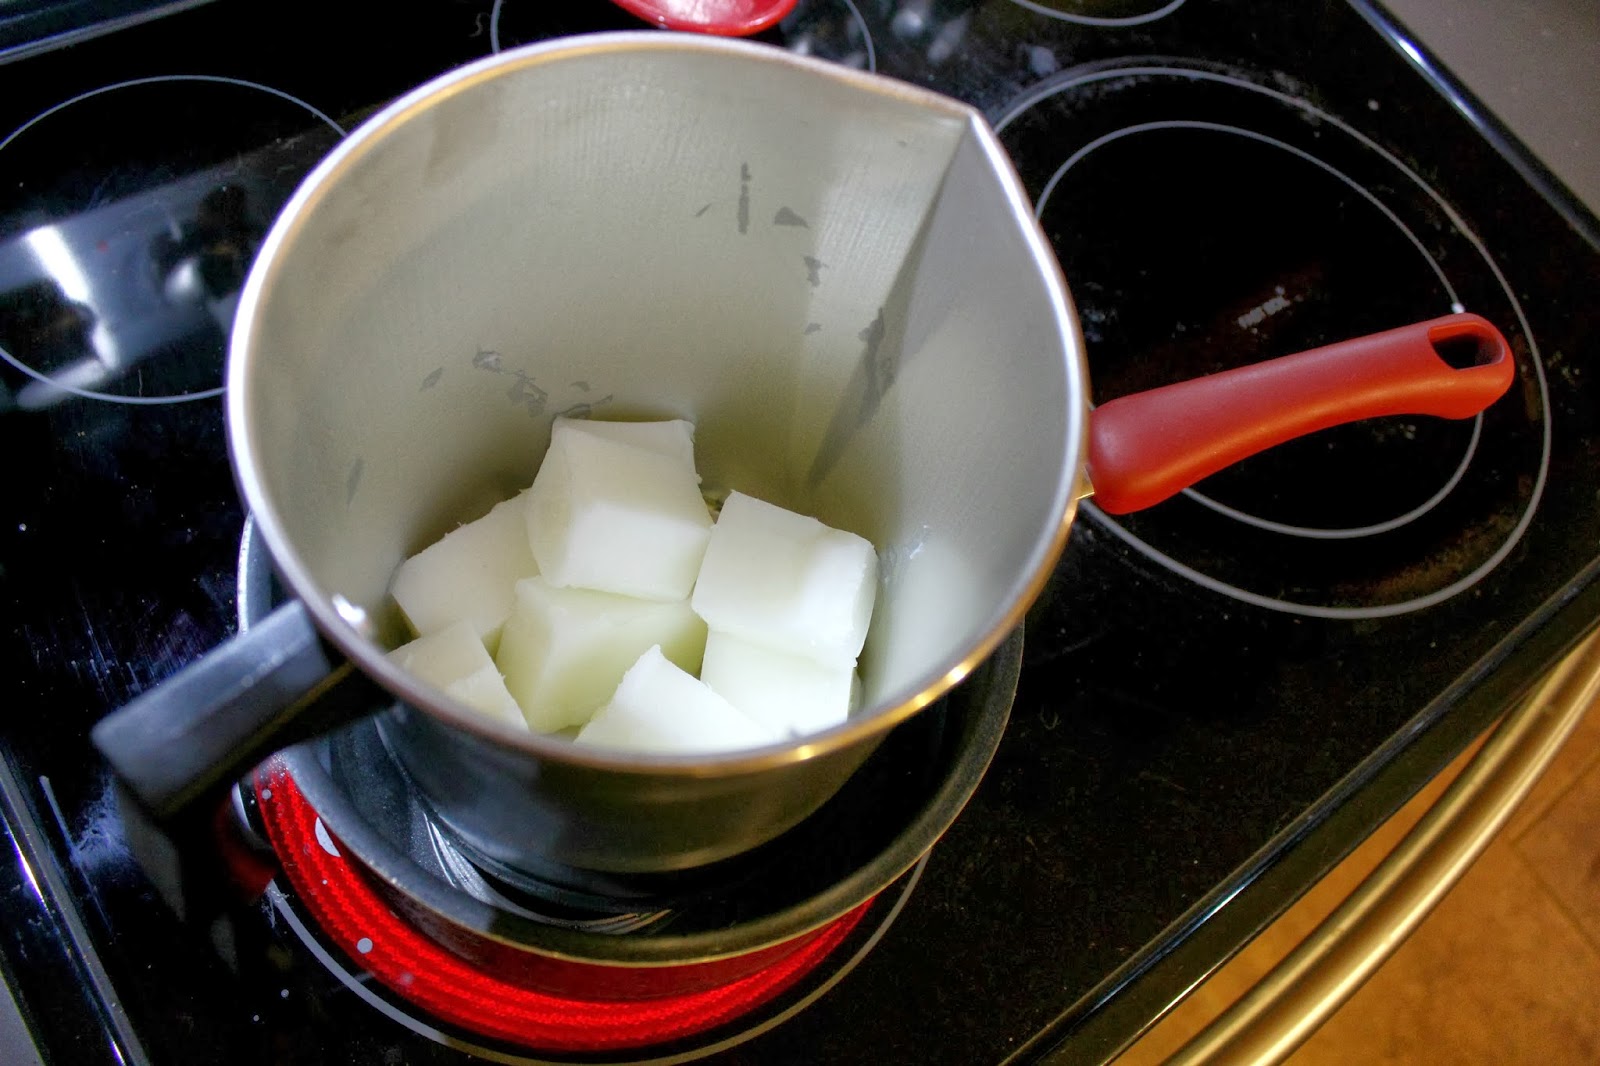
Now to melt the wax. Wax must be melted over indirect heat. If you have a double boiler, use it. If, like me, you don't have a double boiler, canning rings in the bottom of a pot will do just fine. 

Cut the wax up into chunks. The smaller, the quicker it will melt. Melt over medium heat.

Once the candle wax is melted, add the dye. The amount depends on your preferences and the scent you're using. I used Blueberry Flapjacks, and wanted a deeper blue candle so I used around 10 drops of dye. I used a medicine dropper to measure. Lastly, add the scent and immediately pour into candle containers. The longer the scented wax sits in the pot, the more of the scent 'cooks out', resulting in a weaker scented candle.

When pouring the melted wax into the containers, reserve about 1/4 of a cup or so (doesn't have to be exact, just eyeball it). As the wax cools, a reservoir will form around the wick. You'll need to re-melt the reserved wax and top the candles off so the wax will be flat all the way across when you're done. Make sure your wicks stay centered; butter knives worked for me!

Once candles have cooled and are solid (a few hours), clip wicks to 1/4" length. Use right away or store. 

I challenge you NOT to get obsessed with making your own candles. Happy candle making!

Thursday, November 21, 2013

$5 Decorative Pillows


First of all, I made each entire pillow (form and cover) for LESS THAN $5 EACH. Score!

Pillows are the easiest way to update a space, be it the living room, or bedroom. Even better, they're possibly the most inexpensive way to do so, especially if you make your own pillows. Pillow envelope covers are a great beginner project, and a breeze for both intermediate and experienced sewers. Have you priced decorative pillows at Target recently? Its a little outrageous. Twenty five dollars for a tiny be-jeweled (uncomfortable) pillow? ....Yeeeeah, I'll make my own.  All you need is a pillow form, and cute fabric. Bam, instant couch face lift! A detailed pillow envelope cover tutorial can be found here.

Sunday, October 27, 2013

Pin-Up & Pilot Costume


Last night was our local Eagles Club Halloween Party. I've been waiting for an excuse to dress up since I officially became 'too old' to trick 'r' treat. We're not much for the bar scene so other than our club, my husband and I don't go out much. I'd rather stay home and talk to my dogs, and chickens than hang out with most other people my own age. His classic rock cover-band was booked early last month to play at the Eagles for a Halloween Party. Right away, I set to work planning our costumes. YAY!

Several people have told me I have a certain 'look' about me reminiscent of the WWII era... maybe its the winged eyeliner I typically sport, who knows. Regardless, I take it as a huge compliment! Women in the 40's were so classic and beautiful. Nowadays, we're getting less class, and more people like Miley. Yuck.

This costume was so much fun to wear, and actually very easy to put together. You just need some odds and ends that you may have in your closet/makeup bag. IF your husband or boyfriend has an olive green jumpsuit, GREAT, on the off chance that he doesn't (like mine), they are available at army surplus store, thrift stores, and sites like Amazon.

Pin-Up Costume
- Halter Style Dress
- Rhinestone or Pearl Jewelry (I found a necklace and earring set for $10 at Wal-Mart)
- Red Pumps (and Ibuprofen for wearing said pumps all night)
- Victory Rolls (this tutorial will help!)
- Red Lipstick
- Liquid Eyeliner
- Fake Eyelashes, optional
- Flower for your Hair (I hot glued an old fake rose to a hair clip, super simple)
- Red Nails

Pilot Costume
- Olive Jumpsuit
- Aviator Sunglasses
- Pilot Wing Pin (found one on Amazon for $9)

Thursday, October 24, 2013

Mason Jar Soap Dispenser

Since I started canning over the summer, I've become obsessed with mason jar everything. I've replaced the cups in my kitchen with pint mason jars, use pint and a half jars as vases, I have mason jar wall art, I store pasta and flour in giant gallon sized mason jars.... you get the idea. Whilst perusing the aisles of Target, searching for new bathroom items (couldn't find anything I liked), my husband had the bright idea that I should try to make things out of mason jars for the bathroom as well. That man really is a genius sometimes. I plan on using mason jars as toothbrush, q-tip, and cotton ball holders alongside this beautiful mason jar soap dispenser. And of course one will go in the kitchen! Doesn't get much more country than that, eh?


Materials Needed
Pint Mason Jar
Soap Pump (I used a plastic pump from a $1 bottle of hand soap)
Nail
Hammer
Pliers
Strong Water Resistant Adhesive (I used a type of Gorilla Glue)
Rubber Band (for glue curing purposes)

Remove the soap pump and rinse the residual soap from it. Mark the center of the lid. Using your nail and hammer, tap little holes into the lid, opening the space with the pliers as you go, until you have a big enough hole so that the pump fits in snugly. Apply glue to the part of the plastic pump base that will connect with the mason jar lid, situate lid and pump onto jar, and secure with a rubber band for 24 hours (or as long as the glue instructs). Voila! 

Monday, July 8, 2013

Storing Your Tea Collection

Last Christmas my husband got me one of my favorite presents to date: he subscribed me to a tea-of-the-month club. To some that may seem dull or silly, but actually it was incredibly thoughtful. My husband knows his wife well. He's known about my tea obsession since day one, or maybe day five, I probably didn't bring that up on the first date for fear of scaring him off.

Ever since that first neat package of tea arrived in the mail, my tea collection has steadily (and rapidly) grown. I currently have over thirty types of herbal, green, black, white, chai, and specialty blend loose leaf teas. The sealed envelopes the tea comes in keeps it mighty fresh but isn't exactly aesthetically pleasing. So a few weeks ago I moved all of my tea into appropriately sized mason jars, added labels that specify not only the type of tea but also how many teaspoons it takes to make the perfect cup of delicious and soothing tea. 


Tuesday, April 30, 2013

Homemade Laundry Detergent

This is the BEST laundry detergent you will ever use... but that's just my opinion. It is however, the best laundry detergent I've ever used, and that's a fact. This magic detergent gets out stains, makes colors brighter, towels fluffier, it will save you money, and it lasts forever. It smells wonderful, too! Credit where credit is due - this is not my recipe, I found it here


Supplies Needed:
1 (4 lb 12 oz) Box of Borax
1 (3 lb 7 oz) Box of Arm & Hammer Super Washing Soda
1 (3 lb) Container of OxyClean
2 (14.1 oz) Bars of Zote Soap - you can also use the ounce equivalent of Fells Naptha or even bars of Ivory Soap (which is what I used because I couldn't find the previous two types of soap)
1 (4 lb) Box of Arm & Hammer Baking Soda
1-2 (55 oz) Bottle of Purex Crystals Scent Enhancer- or use 3-4 bottles of Scentsy Washer Whiffs

If you use Felz Naptha, or Zote, it will need to be hand grated. If you decide to go the Ivory route (which is easier but doesn't necessarily clean as well as the others), the bars can be microwaved one at a time for about a minute. They will expand and look similar to a large puffy cloud! Allow the soap to cool for a minute or so, and crumble it into a powder.
Now dump all ingredients into a large bucket. For ease of mixing purposes I recommend layering the ingredients. While mixing, the chemicals get stirred up into the air so I also recommend covering your face during or holding your breath. 
As you can see you have quite a hefty amount of laundry detergent. The best part is, you only need 2 Tablespoons per load of laundry. I use three if it's in really bad shape. If you used the Purex Crystals, you can store some of the laundry detergent in the bottle for convenient usage, and the cap has a line that is equivalent to about 2 Tablespoons! How handy is that? 

This detergent doesn't suds up, but it gets clothes cleaner than any store-bought suds producing detergent I've ever used. Also just to give you an idea of how long it lasts, I made this detergent roughly five months ago, and with using only this and washing at least one load a day between my husband and I, there is still half left. It just might be magic.

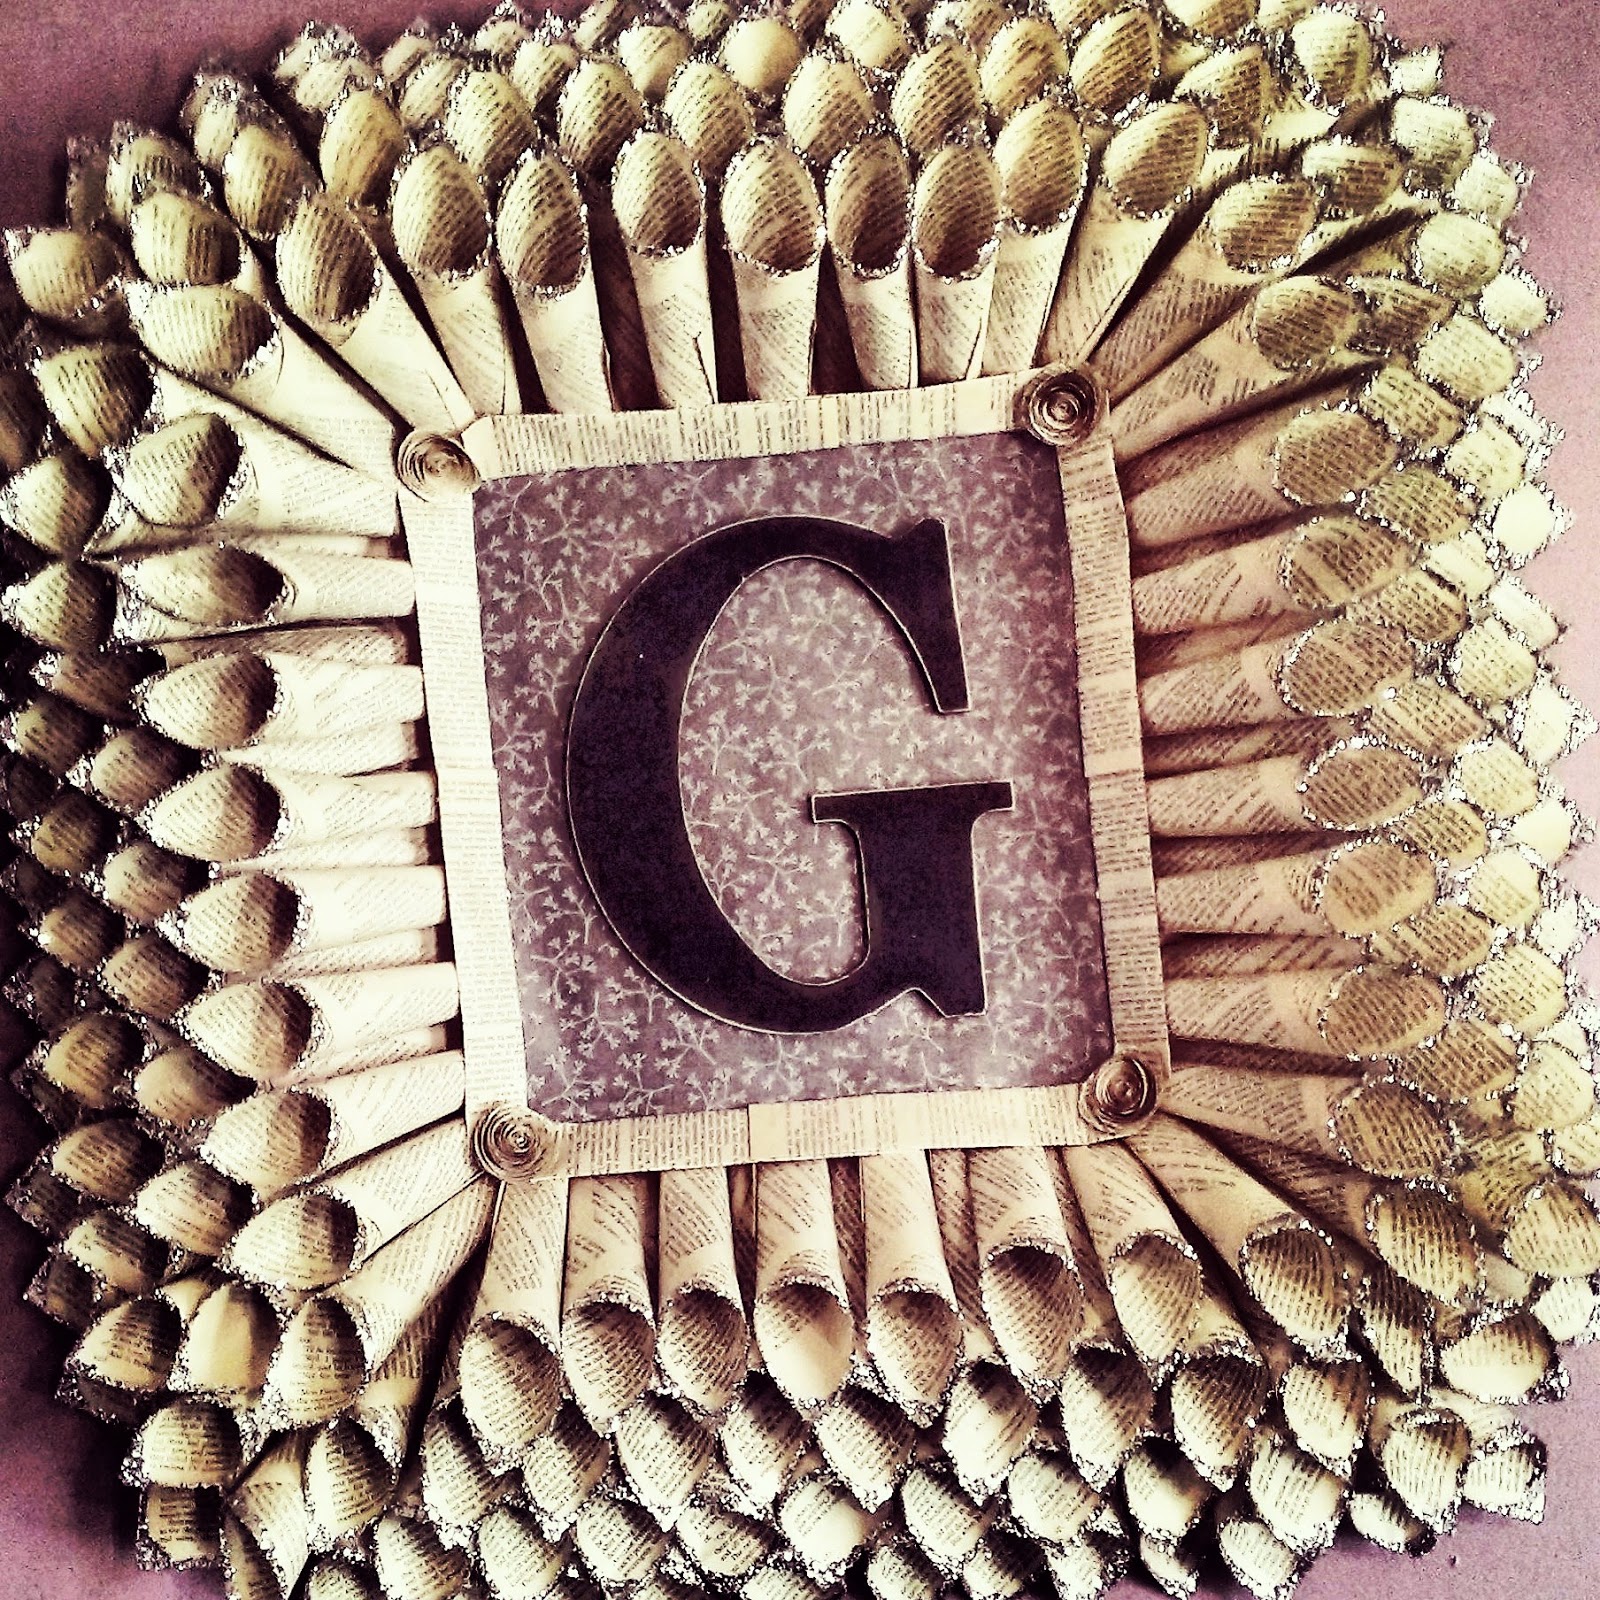
Monogrammed Glitter Book Page Wreath

We moved into our current house last fall. I was bored with most of the decor that we had moved over from the previous house and wanted to bring a breath of fresh air into the new house, which had so many possibilities. My favorite crafts to make are inexpensive decorative ones. Books at thrift stores are very cheap. Last year I bought four at a thrift store for a whopping $1. They really come in handy for book page wreaths, rosettes, and even gift bows. This particular decorative craft is hanging in our bedroom right now. It really meshes well with the 'romantic' tone and colors of antique purple, soft yellow, and pale grey. This project is time consuming but I love the outcome and I think you will too!


Supplies Needed
Old Paper Back Book
Hot Glue Gun and Glue Sticks
Elmer's Glue
Glitter
Scrap Book Paper
Piece of cardboard that's about 2/3 the size you want the finished project to be
Painted Wooden Letter

You can make as many or as few paper cones as you'd like, keeping in mind that the more you make, the fuller the finished project will look. The best way to tackle this is to do one part at a time. Make all the paper cones first. Gently remove the book pages from the book, then one at a time curling a page inward and securing with a dot of hot glue. Since you don't know exactly how many you'll need, make a bunch then move onto the glittering process. You can always make more paper cones and you will undoubtedly need to. 

Pour about a quarter inch of Elmer's glue into a small and shallow bowl. Dump some glitter into another small and shallow bowl. Dip the ends of the paper cones into the glue, followed by a dip into the glitter, and set aside to dry. I recommend putting a towel down where you intend to set the cones to dry. The glue shouldn't drip but you will get glitter EVERYWHERE otherwise. Continue the process until all the cones are glittered.

Once dry, begin attaching the small end of the glittered paper cones to the cardboard backing with a dot of hot glue. Secure your back row of glittered cones about two inches from the edge of the cardboard. This will make the cones stable and less floppy when moving around. Work your way around and eventually inward. Leave about an inch distance between the glittered end of each cone. You'll need less paper cones this way, and it will still look just as full. Make more cones if necessary. Repeat the attaching process on the second layer of paper cones, but this time glue the small end of the cones in between the space you left in the first layer. Repeat all the way around until you get the fullness you like. 

Once done with the paper cone portion, cut a piece of scrapbook paper to snugly fit the blank space of cardboard where your letter will go. Using Elmer's glue, secure the scrapbook paper in place. To cover the ugly spot where the scrapbook paper meets the unfinished ends of the paper cones, I folded eight book pages lengthwise, secured them closed with a few dots of hot glue, and attached them to the cardboard/paper cone end area with a few more dots of hot glue. I then made four book page rosettes to make the corners look more 'polished.' 

Finally, using hot glue, secure your painted letter to the center of the project. Voila! This has been hanging in our bedroom for about five months now, and while the project doesn't appear to be losing glitter, it still magically ends up sprinkled on our nightstand. Not a lot of glitter but still glitter. We all know how impossible it is to get rid of glitter. I haven't tried it yet, but spraying the project (focusing on the glittery ends) with a spray on clear coat (such as Rustoleum or Krylon) would probably secure the glitter on there for good. 

Happy glittering!

Monday, April 29, 2013

Antique Garden Signs & Spoiled Dogs

Winter makes me absolutely stir-crazy. I get cabin fever like no one I've ever encountered. Plants, leaves, flowers, wild bird chirps (we get quite enough tame bird chirping from our parakeets), lightening bugs, gardening, etc. are what I live for. This past winter I passed the time planning what would be in store for the backyard this spring, summer, and fall. I planned the strawberry patch, herb garden, sunflower garden, vegetable garden.... I think you get my drift. Between studying seed catalogs, and using virtual garden planners (I highly recommend Grow Veg by the way), I made little antique-ish garden signs for three of the gardens.

Our dogs are our world; we absolutely adore them. From the tips of their little wet noses, which I if I get close enough are sure to accompany lots of kisses, all the way to their furry tails that wag with such excitement at the sound of my voice. So of course they need garden signs! They need everything their little hearts desire (and obviously some things they don't really care about, like garden signs). You guessed it, they're incredibly spoiled. 


Russell, our Chihuahua, LOVES strawberries. Strawberries make him go, what we call 'Chi-Crazy'. That love is followed closely by his love of corn anything - kernel, cob,  husk, stalk... even the root. Everything. Also ice cream, but what dog DOESN'T love ice cream? Actually, Russell is the reason I decided to plant a strawberry patch in the first place, so that he could have fresh strawberries whenever the fancy strikes him. Easy choice, Russell shall claim the strawberry patch!


Luna, believe it or not, thoroughly enjoys weeding the garden in the warmer months. She trods through, chomping on weeds, eating some, pulling some out and dropping them. It's quite a sight to behold. She also really enjoys green beans, sugar snap peas, carrots, and cabbage. I declare Luna shall reign over the vegetable garden!


Chester is the youngest and least set in his ways. While he doesn't have a particular passion for sunflowers, he just doesn't seem like an herb garden kind of guy. Herbs are much too serious. Sunflowers it is! Also, knowing him and knowing how carefree he is, I think he an the sunflowers will get along just fine. For some reason, small dogs seem to really enjoy taking on large things so I'm really hoping to see him attempt to take down a 12 foot sunflower or two. He's a Chihuahua/Dachsund mix, I'm pretty sure both of those breeds would attack a lion if they ever got the chance. Such mighty little warriors!


Supplies Needed
Piece of Wood
Acrylic Paint (Indoor or Outdoor)
Brushes
Small Sanding Block
Wax


I happened to have three 'wooden' craft plaques taking up space in our spare room. I sanded them enough to smooth out the previous paint. Unfortunately the only craft paint I had was indoor acrylic paint. Hmmm, didn't want to go to all that work to have the color fade in the sun, or worse - wash away in the rain! A light bulb went off in my head, I have a ton of spray on clear coating. Being bored and itching to do something crafty, I decided to risk it.

First things first, if you want to give any sign a worn feel, there must be 'older' paint showing through underneath. Even though the plaques already had old paint underneath them, it would take a few years to start showing through. No thanks. So grab a dark color (I chose black) and paint around the edge of the wood. I go about 1/2 inch into the part I'm going to get artistic on and all around the sides. Let dry. Using wax (I actually used a Scentsy cube because it was handy, but a candle, or actual beeswax will do) and mark where you want paint to come through. I marked all around the edge and into the sign portion - get messy with it but remember whatever you put wax on, the next layer of paint will not stick to. 

Now, put on a few layers of whatever base paint you choose. I used Plaid Apple Barrel's Light Ivy Green. Let dry, then start sanding! Make sure to get wherever you spread the wax, and even sand some of the base paint if you like. 

I'm a big fan of free hand painting because, well, I don't play by the rules! But seriously, I'm just too lazy to use a stencil or print anything out and mess with modge podge. I use a trusty ole' pencil and an eraser to draw out what I'm going to paint. It takes some practice getting everything centered, but it works for me. After you've drawn everything on, get to painting! Be creative, mix colors, use different brushes. I got frisky and used the fancy fanned brush for the carrot tops and I must admit, they turned out great!

Once dry, use a clear, protective SPRAY paint to add several layers to the front, back and sides. I sprayed on about three layers just to be safe. I don't advise using a clear coat that you have to brush on, as it may smear the indoor acrylic paint.

Attach to a garden stake and proudly display your work of art in your (or your dogs) garden! Luna let's Chester slide because he can't read yet. Oh, to be a young pup in a garden on a sunny day.