Tuesday, May 21, 2013

Pupcakes: A Very Special Doggie Birthday Treat!

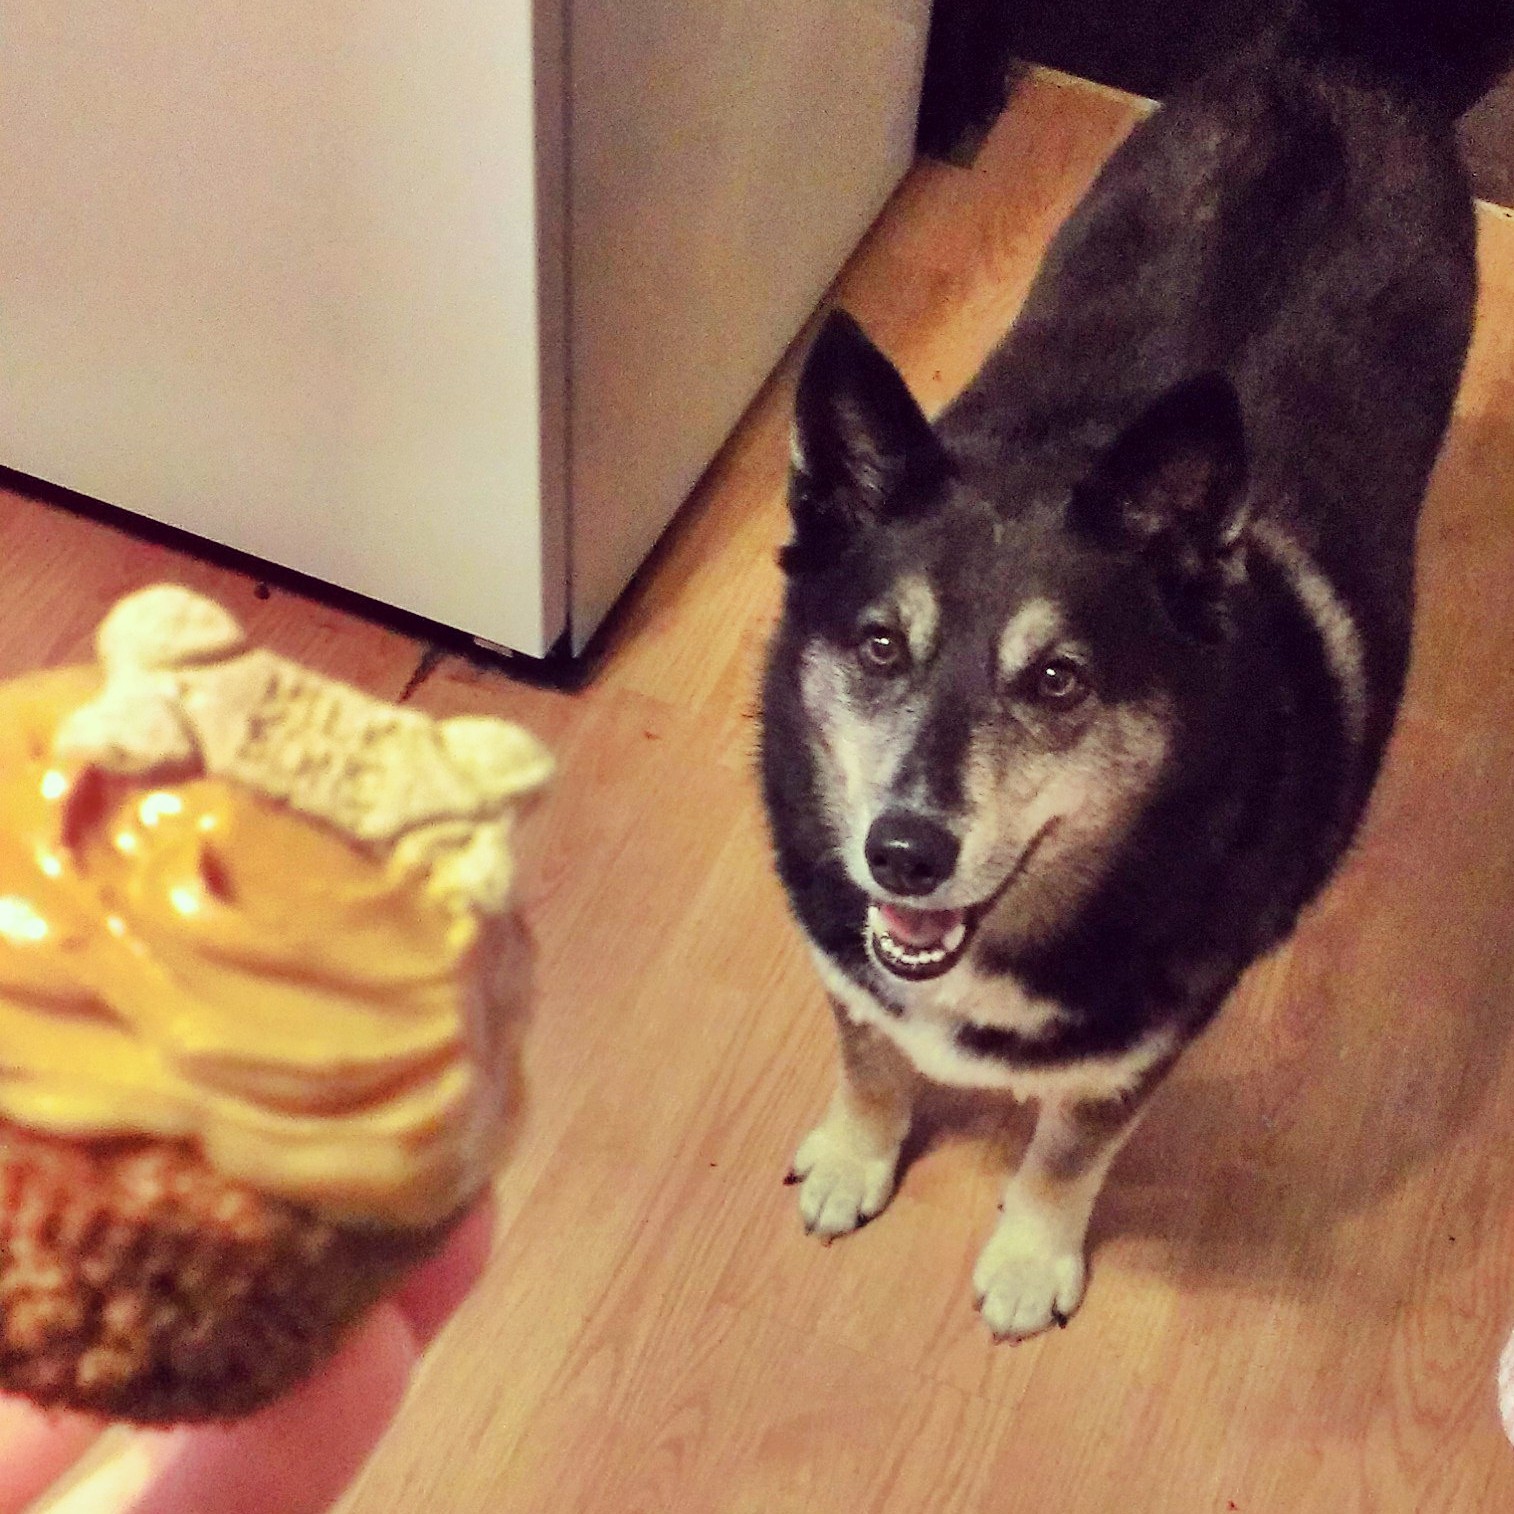
My baby girl, Luna, turned six yesterday. SIX. Where oh where has the time gone? It seems just yesterday she was a small bundle of fur, bumbling around on tiny puppy paws, pooping in every corner she could find, and chewing up everything I owned. In return she taught me responsibility, patience, and as cliche as this is, she taught me all about love. She got away with everything because she's so cute. Who can seriously reprimand a puppy face? Not me - perhaps that's why all of my dogs are so spoiled. I genuinely believe all dogs deserved to be spoiled for everything they do for us, teach us, and give us. A dog-birthday is nothing to be taken lightly!


Pupcakes

makes 9 pupcakes

1 Egg
1/4 c. Natural Peanut Butter
1/4 c. Cooking Oil
1/3 c. Honey
1 c. Shredded Carrots
1 c. Whole Wheat Flour
1 tsp Baking Soda

Preheat the oven to 350 degrees F. Combine the egg, peanut butter, oil, honey, and carrots in a large bowl, blend well. Combine flour and baking soda then add to the carrot/peanut butter mixture. Blend just until moist. Spoon cake batter into muffin cup lined tins. Fill 2/3 full. Bake for roughly 20 minutes or until golden brown. Insert toothpick in center to check done-ness. Cool completely on a wire rack. Ice with natural peanut butter if desired and top with a milk bone. We happen to have two very small dogs so I had the perfect pupcake-sized mini milk bones on hand. 

Freeze the rest or share the wealth if you have other dogs. Russell, Chester, and our cat, Shanks, shared a pupcake. No way their tiny bellies could handle a full pupcake. Luna got a full pupcake though - she's a professional at this kinda thing.

Taunting your dog with the pupcake is totally optional :P  


Tuesday, May 14, 2013

Fresh Watermelon Lime Sorbet

It's warm today, like in the 90's warm, and it's only the middle of May. Like most people I look forward to the summer and all the activities that go along with it - but I don't look forward to the so-hot-you-think-you-might-die heat. There is a bit of relief to be sought from the warmer months in the form of air conditioning and frosty treats. Our new ice cream maker will come in super handy with the latter. Earlier in the month, I made Strawberry Lemon Ice Cream with leftover strawberries from my Strawberry Jam making soiree. The only attendees were my husband, our dogs, and cat. Mostly, everyone else just slept the entire time I was making jam. Okay, not much of a soiree but I'm still calling it that. I like that word. Soiree. 

Anywho, we've recently developed an obsession with watermelon, not only buying four watermelons in the last two weeks and devouring them, but also tilling up an additional 14' x 14' chunk of earth for a watermelon patch. What better way to cool off on a warm streak than a fresh sorbet? Not many that I can think of. Unless of course someone wants to come over and install a swimming pool for us. Seriously, I'll even give you some sorbet!


Fresh Watermelon Lime Sorbet

3/4 of a Large Watermelon, cut into chunks and de-seeded
1 c. Sugar
1 c. Water
Juice of 3 Limes

In a small saucepan, combine sugar and water over medium heat. Stir until dissolved. Combine watermelon, lime juice, and simple syrup in a blender (it will take a few batches) until liquefied. Freeze in ice cream maker per instructions. Mine took about 30 minutes to create a soft-serve consistency. Enjoy by itself or even combine with your favorite wine for a refreshing sangria! 

Dilly Beans

I confess, I'm a green bean addict - the fresher the better. Oddly enough, before this morning I had never in my life had a pickled green bean. Last night was filled with green bean trimming, gardening, and pickling. I couldn't wait to try one, but alas they were still too hot when I finally went to bed. Perhaps pickled green beans are not the ideal breakfast food, but I just couldn't wait to open a jar up this morning. They are so good! Crunchy, pickle-y, and green bean-y. Yummy. This recipe is almost identical to the Dilled Beans recipe in the Ball  Complete Book of Home Preservation. I did however increase the pickling liquid amount as I had roughly the four pounds of beans the original recipe called for, but instead of making 6 pints as the original recipe estimates, I had enough for 8 pints. Before you say anything, I packed those green beans in there good! Such is the life of a canner I suppose (if I can ever bestow that wonderful title upon my amateur self yet), I've come to realize you just have to go with the flow, and be thrilled when you are blessed with a few more half-pints/pints/quarts than you had planned.

Our neighbor has to be one of the nicest people I've ever met. He's a gardener like myself and we often chit chat through our dividing privacy fence - mostly about our gardens, and we also do a little complaining about the wacky weather in our neck of the woods. A high of 78 degrees one day and then bottoming out to 39 degrees three days later - c'mon! Today canning became the topic of conversation. Silly me, I guess I hadn't realized men like to can, too! Having never heard of dilly beans, he wanted to try some. I gave him a pint and they were a big hit. In return, there is now a stick of deer sausage in our refrigerator and he offered more if we liked it. It's nice to know that there are still nice and neighborly people in this often too-busy-to-be-nice kinda world. 


Dilly Beans

makes 8 pint jars

4 c. White Vinegar
4 c. Water
1/4 c. Pickling Salt
4 lbs Green Beans, trimmed to jar-size
3 Bell Peppers (I used yellow, red, and orange)
4 tsp. Dill Seed or 8 Heads of Dill
8 Garlic Cloves
32 Whole Peppercorns

Prepare jars, bands, and lids. Combine salt, vinegar, and water in a large sauce pan. Bring to boil. To each jar add 1/2 tsp. Dill Seed (or 1 Head of Dill), 1 Garlic Clove (I split mine lengthwise to release more flavor), 4 Whole Peppercorns, then pack in green beans and bell pepper mixture. Ladle hot pickling liquid into each jar, leaving 1/2 inch headspace. Remove air bubbles, add more pickling liquid if necessary, wipe rim of jar, and affix lid. Process jars for 10 minutes. Turn off heat and let sit in canner for additional 5 minutes before removing. Cool, label and store. 

Easy Alfredo Pizza Sauce

Using my garlic pizza crust recipe, I concocted this DELICIOUS Alfredo pizza. While we salivate over the thought of pretty much every kind of pizza known to man, I wanted something a little different than the typical robust tomato sauce based pizza I usually make. It turned out wonderfully and I will definitely be making this pizza again... is tomorrow too soon?


Alfredo Pizza Sauce

makes enough sauce for two medium sized pizzas

1 1/2 c. Milk (I used 2%, but Skim or Whole Milk will work as well)
1/4 c. Butter
1/3 c. Parmesan Cheese, Grated
2 Tbsp. All Purpose Flour
2 Garlic Cloves
1 tsp. Sea Salt (this is roughly what I used, you may want to add more or less depending on your tastes)
2 tsp. Freshly Ground Black Pepper

Make a roux by melting the butter in a medium saucepan over medium heat, add in flour, stirring continually. Allow to bubble for a minute or so - still stirring. Stir in milk, cover and simmer for a few minutes until thickened, stirring occasionally. Once slightly thickened, add in cheese, salt, and pepper. Grate garlic cloves directly over the saucepan. Stir until cheese is melted and sauce is thick and creamy. Remember that the sauce will thicken as it cools, but if sauce is still thinner than you'd like, simmer (with lid off and stirring occasionally) for a few minutes until desired thickness is reached. Cool completely before using. 

There are tons of topping combinations you could use with this sauce to make some super tasty pizza. I used broccoli, and sliced mushrooms this time around. Here are a few other topping ideas I look forward to trying in the future: Chicken & Spinach, Bacon & Jalapenos, Chicken & Tomatoes, Mushrooms & Spinach, Black Olives & Feta, etc. Use your imagination - almost anything will be amazing with this delicious Alfredo sauce. Enjoy!

Monday, May 6, 2013

Garlic Pizza Crust

We're a house of pizza lovers. All kinds of pizza combinations, too! Pepperoni and Banana Pepper, Ham and Pineapple, Chicken and Spinach, Italian Sausage and Mushroom, Chicken and Onions, Bacon and Jalapenos, Tomato and Basil, Mushroom and Black Olives... I'd continue but I think you get the point. This pizza dough isn't exactly what most might deem 'healthy', but it's certainly better than the oil loaded crust from most pizza places. And it's so yummy! It's hard to beat warm homemade pizza dough covered with tangy saucy, cheese and your favorite toppings. 


Garlic Pizza Crust

makes enough for two large pizzas

1 packet of fast rising yeast
2 tsp. Salt
2 tsp. Sugar
1 tsp. Garlic Powder
2 Tbsp. Extra Virgin Olive Oil
1 1/2 c. Warm Water
3 1/2 c. Flour
1 Tbsp. Basil (Optional)

In a large bowl, combine yeast, salt, sugar, garlic powder, basil, and olive oil. Pour in warm water, stir and allow yeast to blossom until foamy (5-10 minutes). Add in 3 cups of flour, so that the dough is coming together but still sticky. Using your hands add in the additional flour and knead the dough right in the bowl. I've never been much for kneading on a floured surface, to me it makes an unnecessary mess. Add in additional flour - you may need to add a small amount of additional flour to make the dough firm and no longer sticky. Knead for a few minutes until smooth and elastic. 

Spray another large bowl with olive oil spray or coat in a thin layer of olive oil using your fingers. Transfer dough into oiled bowl, and cover with damp towel or plastic wrap. Leave to rise in a warm place for 1 to 1 1/2 hours. 

Once doubled in size, sprinkle a little flour on the dough and punch it down. Knead for an additional minute. Allow dough to rest for 10 minutes. In the mean time, prepare pizza toppings. Preheat oven to 375 degrees. Halve dough and place on greased pans. Alternate working each pan of dough, stretching a little at a time and allowing a few minutes of rest for each dough. 

Top dough with desired toppings (we love fire roasted tomato sauce, mozzarella cheese, grape tomatoes, and basil), and bake for 30-35 minutes or until golden. Enjoy!

Peanut Butter Bacon Dog Treats

Have I mentioned how spoiled our dogs are? We take them on multiple car rides per week. Chester, and Russell snooze peacefully in my lap while Luna hangs her head out of the window, tongue flopping happily in the wind. They each have a garden in the backyard. We bought a new king size bed just so they could sleep in the bed with us. Why shouldn't they get homemade treats? I found the original recipe here. They're a fun treat to make, and they're good for your pups, too!


Peanut Butter Bacon Dog Treats

makes anywhere from 30-45 treats, depending on how thin you roll your dough

1/2 c. Natural Creamy Peanut Butter
1 Tbsp. Honey
1 Large Egg
1/2 c. Water
1/3 c. Shredded Carrot
3 Pieces of Bacon OR 3 Tbsp. Bacon Bits
1 c. Oat Flour OR 1 1/2 c. rolled oats, processed until floury
1 c. All Purpose Flour OR Whole Wheat Flour (I chose to do half of each)

Preheat oven to 350 degrees. In a medium bowl, combine peanut butter, honey, egg, water, carrot, and bacon until well blended. Add flour (all purpose or whole wheat AND oat flour), and work into a dough. Roll dough out to 1/4 inch thickness on a lightly floured surface.


Sprinkle a little flour on top to keep the rolling pin from sticking to the dough if necessary. Cut out shapes with desired cookie cutters and place on a baking sheet lightly sprayed with non-stick cooking spray. 


Repeat cutting out shapes, and re-rolling the dough until you've used up every bit of dough. Bake for 20-25 minutes.  

Cool on cooling rack and store in airtight container, or freeze.

Prepare to be attacked by intrigued pups! They were practically snatching them out of my hands! Actually, Luna did pilfer one treat, then did a victory lap around the yard with it with Chester and Russell hot on her heels. I promise your dogs will love them - unless of course they don't like bacon. I have yet to find a dog (or person for that matter) that doesn't like bacon. 


These treats will have them lining up to get one, then begging for more when they're all gone. They may even cause a harsh sibling rivalry of epic proportions. Chester already gobbled his up but it's just not fair that Luna gets one when he doesn't even have a crumb of his left. 

Terribly, terribly unfair.

Sunday, May 5, 2013

Homemade Pasta


Recently (as in four days ago) I purchased a pasta making machine. Before you call me lazy, it doesn't do everything for me, but it does make pasta making a breeze! If you decide to start making your own pasta, I highly recommend a drying rack, otherwise it would take at least double the time to dry your pasta. I've considered making pasta by hand, rolling out the dough and cutting it... then I never did any of that. Perhaps I could have achieved homemade pasta that way, but that left room for lots and lots of error in my eyes. After all, I just learned to can two days ago! One step at a time for this old girl. With this machine of the gods, all I have to do is mix the dough, run it through the machine a few times to get it the thinness I want, then a quick run through the pasta cutter of my choosing. Boom, fresh homemade pasta! If you've never had homemade pasta (first timer over here), or never made homemade pasta yourself, give it a whirl! There are pasta making machines in a range of prices to fit almost every budget, and I highly recommend getting one if you're a pasta fan. My husband could eat a pound a night if I let him. I'm quite a fan myself, just not a-pound-a-night kinda fan. Fresh homemade pasta blows store-bought out of the water!

Pasta Dough

makes one serving of pasta, double or triple as necessary

3/4 c. Flour
1 Egg
Pinch of Salt (optional)

Make a mound with the flour and make a large well in it (big enough for the eggs). Break the eggs into this well. Add a pinch of salt if you wish. Work the eggs and the flour together with a fork, adding the flour from just around the eggs little by little, until you have a smooth dough, adding just a drop of water if necessary. You can add a small amount of flour if the mixture is too sticky. As soon as you can (when the mixture is no longer sticky), use your hands. Knead the dough for ten minutes, until it is smooth, firm, and quite elastic. Divide the dough into two balls. Flatten each ball of dough with your hands. Pass this dough through the rollers of the manual pasta machine starting with the thickest setting, then moving on to the ideal thinness  setting (usually the last but one setting). Then pass through the machine cutter of your choice (I have fettucine noodles pictured). Allow to dry for 1-2 hours, making sure the strands are well separated and not stuck together. Cook for 5 minutes in plenty of boiling water. Enjoy your delicious creation and be proud!


There are tons of variations to homemade pasta, an as long as you end up with solid noodles, you've done great! Spinach, herbs, and tomatoes can be added to the pasta dough for additional flavor once you get the hang of things. Pasta made like this, dried properly and stored in a cool and dry area, should last for months. Next weekend I plan on making several large batches of pasta to store for use over the next couple of months to save time on weeknight meals. Convenient, homemade, and packed full of fresh flavor - you can't buy that!

Saturday, May 4, 2013

Strawberry Lemon Ice Cream

My husband loves ice cream. It's one of about three things he's not too picky about. Knowing that I could make it better (and eventually healthier once I get the hang of things), I checked out Amazon in search of an ice cream maker. I found this ice cream maker and fell in love. My kitchen theme is country barnyard-esque. Too perfect, and too cute! The ice cream maker came in two days ago, but we've been far too busy to bust it out until tonight. I had exactly two cups of crushed fresh strawberries leftover from the fresh strawberry jam I made earlier. Hmmm... could tonight be the night I put this thing to work? YES! And as with anything involving fresh strawberries and lemon, it was incredible. My husband closed his eyes in euphoric bliss with the first bite and I'm not sure they opened until he finished his bowl.


Strawberry Lemon Ice Cream

makes 2 1/2 quarts

4 c. 2% milk
4 c. half & half
2 c. crushed fresh strawberries
2 c. sugar
1 Tbsp. fresh lemon zest
1 tsp. lemon extract

Combine all ingredients and freeze as directed by ice cream maker. After 30 minutes, my ice cream maker froze the ice cream as much as it could, and it was the consistency of soft-serve. To obtain a firmer ice cream, freeze for an additional hour. Enjoy!

Fresh Strawberry Jam

As I was shopping for a few ingredients for my carrot cake jam, I discovered beautiful strawberries on sale for $0.99 a pound! Though we put a strawberry patch in, it doesn't look like we'll get many berries this year - thanks to the birds, and the lord of the strawberry patch. Not about to pass those gorgeous berries up, I grabbed four pounds, knowing that I could use them for something. Right away, I had strawberry jam in mind. That particular day, I was heading home to teach myself how to can. Perfect. As someone that had only ever experience store-bought strawberry jam before this endeavor... OH MY. Never have I eaten jam with my finger a spoon straight from the jar, until tonight. Don't judge me until you make it. Only then will you understand the power of fresh strawberry jam. Low sugar jam is the only way I'll make jam for the rest of my life. Instead of tasting pure sugar with a strawberry embellishment, you taste fruit. It's Spring/Summer in a jar. 


Fresh Strawberry Jam

makes 7 half-pint jars

5 c. Crushed Fresh Strawberries
1 pkg (OR 3 Tbsp.) Ball Low Sugar Pectin
2 1/4 c. Sugar
4 Tbsp. Lemon Juice

Prepare jars, and lids. Combine strawberries and lemon juice in a 6- or 8-quart saucepan. Gradually stir in pectin. Bring mixture to a full rolling boil that can not be stirred down, over high heat, stirring constantly. Add entire measure of sugar, stirring to dissolve. Return mixture to a full rolling boil. Boil hard 1 minute, stirring constantly. Remove from heat. Skim foam if necessary. Ladle hot jam into hot jars leaving 1/4 inch headspace. Wipe rim. Center lid on jar. Apply band until fit is fingertip tight. Process in a boiling water canner for 10 minutes. Remove lid and let stand in canner for additional 5 minutes. Remove jars, cool, and store.

Friday, May 3, 2013

Dilled Carrots

Really, these should be called zesty dilled carrots. If you're not a fan of 'spicy' stuff, don't let that keep you from making these! I was hesitant at first, as I had  never even heard of pickled carrots.. My recent carrot inheritance inspired me to seek out creative alternatives to keep from wasting anything. I hate to let a good vegetable go to waste. As it turns out, pickled carrots are da bomb! My husband, sister, and mother-in-law loved these tasty little snacks - and those are just the people I've given them to. I'm sure my dad is going to flip out over them as well. Make them, they're great!


Dilled Carrots

makes 8 pints

6 c. white vinegar
2 c. water
1/2 c. canning salt
16 flower heads of dill OR 4 tsp. dill seed
4 cloves of garlic, halved (I doubled this and put a whole clove in each jar)
4 tsp. hot pepper flakes (optional)
5 lbs of carrots, peeled and cut into 1/2 inch wide sticks

Prepare jars and lids. In a large saucepan, combine vinegar, water, and salt. Bring to a boil and stir to dissolve salt. Maintain brine at a gentle boil. Place 1/2 clove (or 1 whole clove) of garlic, 1 head of dill or 1/2 tsp. dill seed, and 1/2 tsp hot pepper flakes into jar. Pack carrot sticks with a generous 1/2 inch headspace. If using heads of dill, top with an additional head. Ladle hot brine into jars, leaving 1/2 inch headspace. Remove any air bubbles, wipe rim, and affix hot lid. Screw bands down to fingertip tightness. Place jars in the canner, and process for 10 minutes. Remove lid and let jars sit in canner for an additional 5 minutes. Remove, cool, and store.

Carrot Cake Jam

Canning has always been an enigma to me; an age old secret passed down from generation to generation that I wanted in on. Our great grandmothers canned, our grandmothers canned, and maybe even some of your parents can food. My parents were certainly never into canning. Being the do-it-myselfer that I am, I decided to teach myself. I've been wanting to learn for years, but it seemed like such an involved and intricate process that would take days, maybe even weeks to accomplish one batch of jam. I was terrified. As it turns out, canning is insanely simple and much more difficult to mess up than I had originally thought. I'm a worry wort.

Recently I came into a surplus of carrots. I like raw carrots, as well as roasted carrots. My dogs enjoy carrot sticks as snacks, but there was just no way we could use up all the carrots before they went bad. A week ago, I had begun gathering the supplies I would need for canning in case I decided to get ambitious and learn before my garden was in full swing and I was up to my ears in tomatoes. Tons of carrots, pectin, sugar, and a hot water canner.... let's give this a try. And I did, and it turned out wonderfully delicious (but I also LOVE carrot cake). It was even still a little too sweet for me, I can't imagine using the 6.5 cups that the original recipe calls for! The original recipe is in the Ball Book of Home Preservation, but as I'm trying to reduce our sugar intake, I used a  low sugar pectin recipe - less sugar, but otherwise identical to the one in the book. 


Carrot Cake Jam

makes 6 half-pint jars

1 ½ cups finely grated carrots
1 ½ chopped, cored, peeled, pears OR apples (I used apples)
1 ¾ cups crushed canned pineapple, including juice
3 tbsp lemon juice
1 tsp ground cinnamon
½ tsp ground nutmeg
¼ tsp ground cloves
1 package (1.75 oz.) low-sugar powdered fruit pectin OR 3 Tbsp.
3 cups sugar

Prepare canner, jars, and lids. In a large stainless steel saucepan, combine carrots, apples, pineapple with juice, lemon juice, cinnamon, nutmeg, and cloves. Bring to a boil over high heat, stirring frequently. Reduce heat, cover and boil gently for 20 minutes, stirring occasionally. Remove from heat and whisk in pectin until dissolved. Bring to a boil over high heat, stirring frequently. Add sugar all at once and return to a full rolling boil, stirring constantly. Boil hard, stirring constantly, for 1 minute. Remove from heat and skim off foam. Ladle hot jam into hot jars, leaving ¼ inch headspace. Remove air bubbles and adjust headspace, if necessary, by adding hot jam. Wipe rims and adjust lids. Process in a water bath canner for 10 minutes. Remove canner lid. Wait 5 minutes, then remove jars, cool, and store.

Tuesday, April 30, 2013

Homemade Laundry Detergent

This is the BEST laundry detergent you will ever use... but that's just my opinion. It is however, the best laundry detergent I've ever used, and that's a fact. This magic detergent gets out stains, makes colors brighter, towels fluffier, it will save you money, and it lasts forever. It smells wonderful, too! Credit where credit is due - this is not my recipe, I found it here


Supplies Needed:
1 (4 lb 12 oz) Box of Borax
1 (3 lb 7 oz) Box of Arm & Hammer Super Washing Soda
1 (3 lb) Container of OxyClean
2 (14.1 oz) Bars of Zote Soap - you can also use the ounce equivalent of Fells Naptha or even bars of Ivory Soap (which is what I used because I couldn't find the previous two types of soap)
1 (4 lb) Box of Arm & Hammer Baking Soda
1-2 (55 oz) Bottle of Purex Crystals Scent Enhancer- or use 3-4 bottles of Scentsy Washer Whiffs

If you use Felz Naptha, or Zote, it will need to be hand grated. If you decide to go the Ivory route (which is easier but doesn't necessarily clean as well as the others), the bars can be microwaved one at a time for about a minute. They will expand and look similar to a large puffy cloud! Allow the soap to cool for a minute or so, and crumble it into a powder.
Now dump all ingredients into a large bucket. For ease of mixing purposes I recommend layering the ingredients. While mixing, the chemicals get stirred up into the air so I also recommend covering your face during or holding your breath. 
As you can see you have quite a hefty amount of laundry detergent. The best part is, you only need 2 Tablespoons per load of laundry. I use three if it's in really bad shape. If you used the Purex Crystals, you can store some of the laundry detergent in the bottle for convenient usage, and the cap has a line that is equivalent to about 2 Tablespoons! How handy is that? 

This detergent doesn't suds up, but it gets clothes cleaner than any store-bought suds producing detergent I've ever used. Also just to give you an idea of how long it lasts, I made this detergent roughly five months ago, and with using only this and washing at least one load a day between my husband and I, there is still half left. It just might be magic.

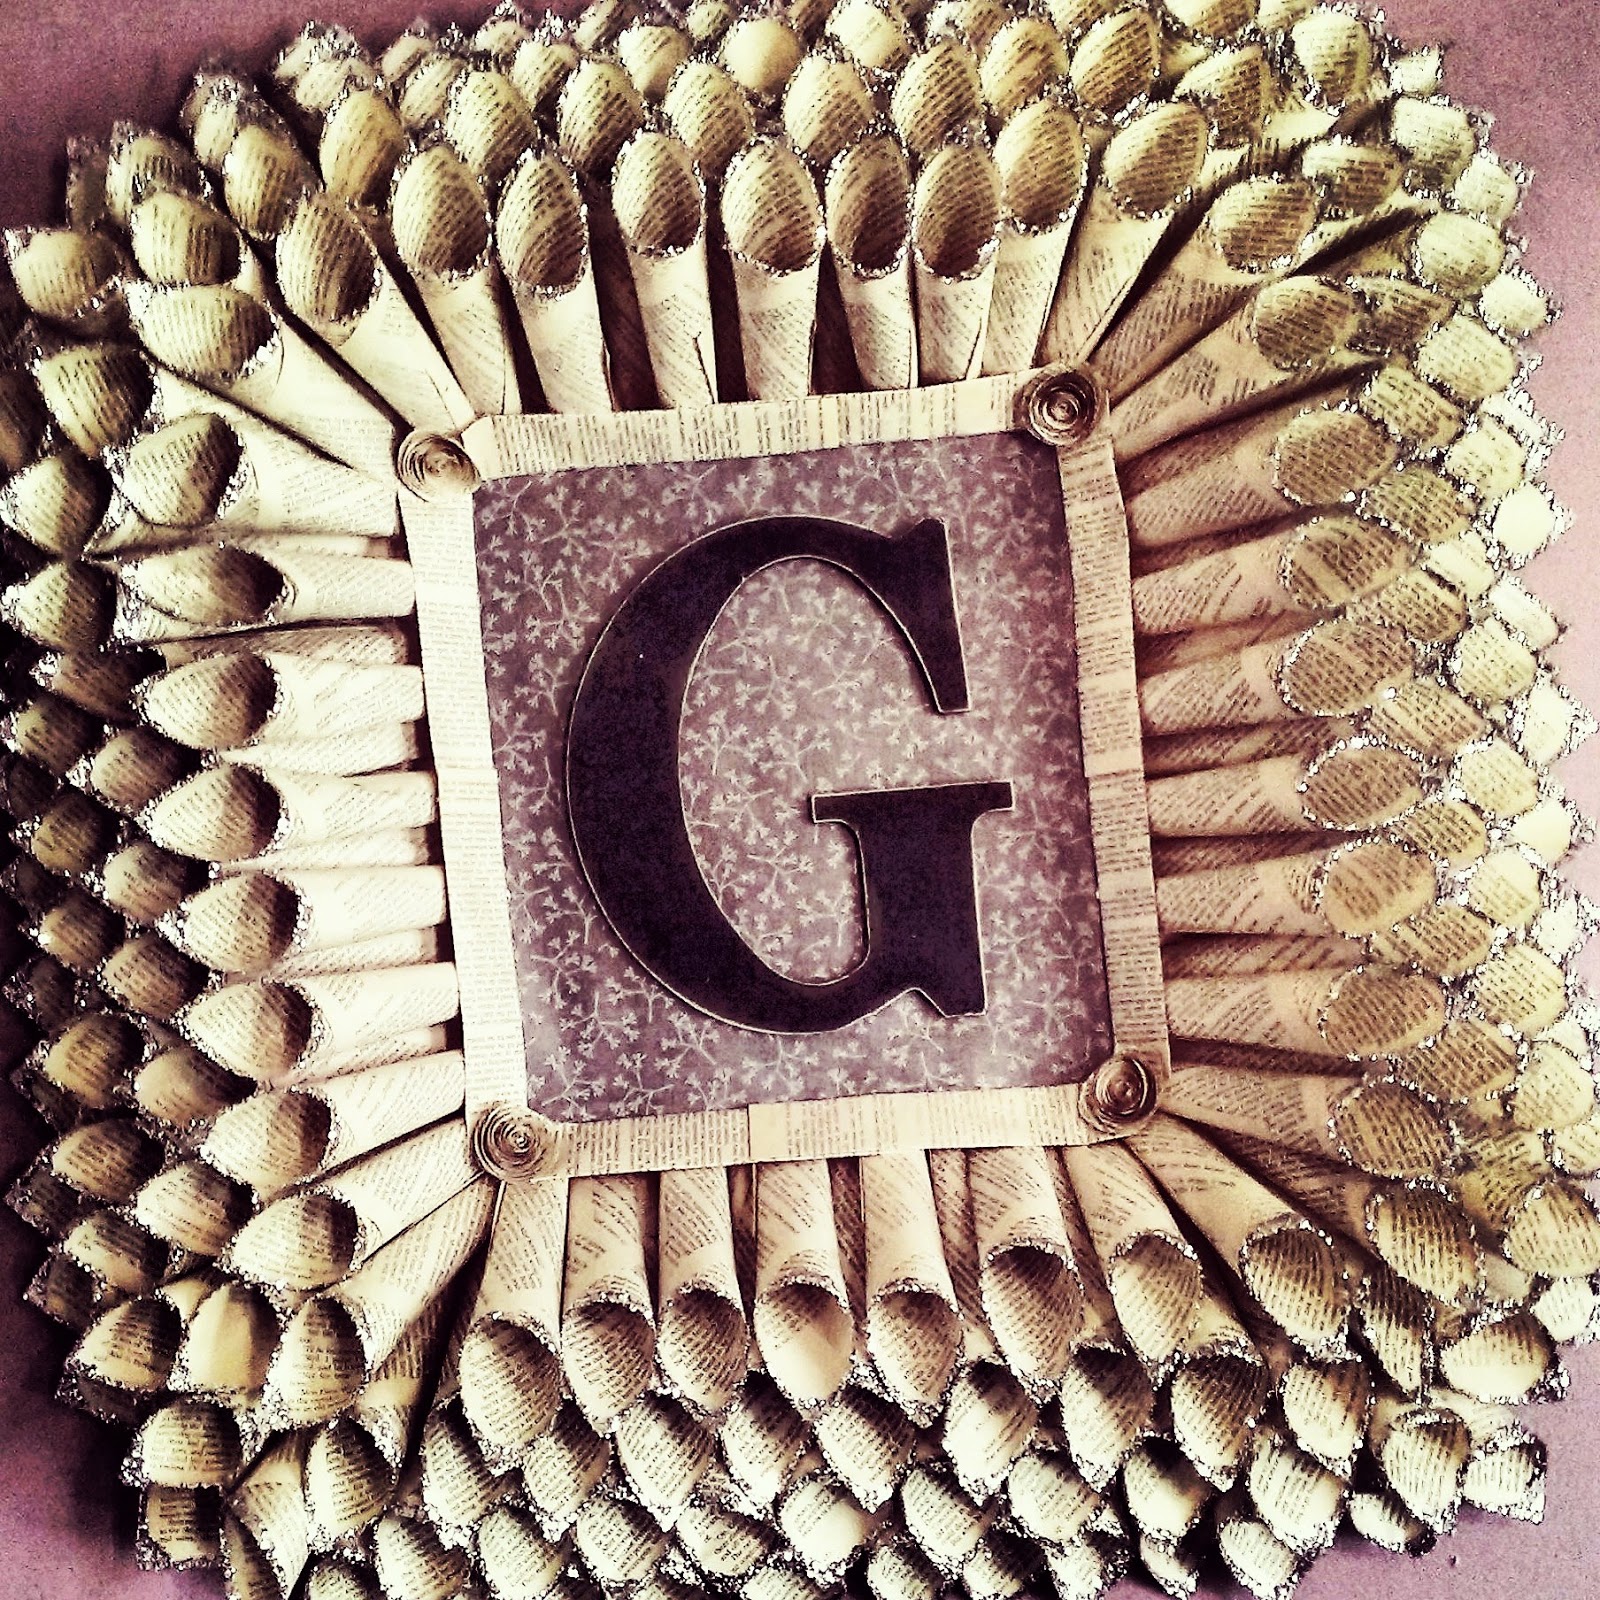
Monogrammed Glitter Book Page Wreath

We moved into our current house last fall. I was bored with most of the decor that we had moved over from the previous house and wanted to bring a breath of fresh air into the new house, which had so many possibilities. My favorite crafts to make are inexpensive decorative ones. Books at thrift stores are very cheap. Last year I bought four at a thrift store for a whopping $1. They really come in handy for book page wreaths, rosettes, and even gift bows. This particular decorative craft is hanging in our bedroom right now. It really meshes well with the 'romantic' tone and colors of antique purple, soft yellow, and pale grey. This project is time consuming but I love the outcome and I think you will too!


Supplies Needed
Old Paper Back Book
Hot Glue Gun and Glue Sticks
Elmer's Glue
Glitter
Scrap Book Paper
Piece of cardboard that's about 2/3 the size you want the finished project to be
Painted Wooden Letter

You can make as many or as few paper cones as you'd like, keeping in mind that the more you make, the fuller the finished project will look. The best way to tackle this is to do one part at a time. Make all the paper cones first. Gently remove the book pages from the book, then one at a time curling a page inward and securing with a dot of hot glue. Since you don't know exactly how many you'll need, make a bunch then move onto the glittering process. You can always make more paper cones and you will undoubtedly need to. 

Pour about a quarter inch of Elmer's glue into a small and shallow bowl. Dump some glitter into another small and shallow bowl. Dip the ends of the paper cones into the glue, followed by a dip into the glitter, and set aside to dry. I recommend putting a towel down where you intend to set the cones to dry. The glue shouldn't drip but you will get glitter EVERYWHERE otherwise. Continue the process until all the cones are glittered.

Once dry, begin attaching the small end of the glittered paper cones to the cardboard backing with a dot of hot glue. Secure your back row of glittered cones about two inches from the edge of the cardboard. This will make the cones stable and less floppy when moving around. Work your way around and eventually inward. Leave about an inch distance between the glittered end of each cone. You'll need less paper cones this way, and it will still look just as full. Make more cones if necessary. Repeat the attaching process on the second layer of paper cones, but this time glue the small end of the cones in between the space you left in the first layer. Repeat all the way around until you get the fullness you like. 

Once done with the paper cone portion, cut a piece of scrapbook paper to snugly fit the blank space of cardboard where your letter will go. Using Elmer's glue, secure the scrapbook paper in place. To cover the ugly spot where the scrapbook paper meets the unfinished ends of the paper cones, I folded eight book pages lengthwise, secured them closed with a few dots of hot glue, and attached them to the cardboard/paper cone end area with a few more dots of hot glue. I then made four book page rosettes to make the corners look more 'polished.' 

Finally, using hot glue, secure your painted letter to the center of the project. Voila! This has been hanging in our bedroom for about five months now, and while the project doesn't appear to be losing glitter, it still magically ends up sprinkled on our nightstand. Not a lot of glitter but still glitter. We all know how impossible it is to get rid of glitter. I haven't tried it yet, but spraying the project (focusing on the glittery ends) with a spray on clear coat (such as Rustoleum or Krylon) would probably secure the glitter on there for good. 

Happy glittering!

Monday, April 29, 2013

Antique Garden Signs & Spoiled Dogs

Winter makes me absolutely stir-crazy. I get cabin fever like no one I've ever encountered. Plants, leaves, flowers, wild bird chirps (we get quite enough tame bird chirping from our parakeets), lightening bugs, gardening, etc. are what I live for. This past winter I passed the time planning what would be in store for the backyard this spring, summer, and fall. I planned the strawberry patch, herb garden, sunflower garden, vegetable garden.... I think you get my drift. Between studying seed catalogs, and using virtual garden planners (I highly recommend Grow Veg by the way), I made little antique-ish garden signs for three of the gardens.

Our dogs are our world; we absolutely adore them. From the tips of their little wet noses, which I if I get close enough are sure to accompany lots of kisses, all the way to their furry tails that wag with such excitement at the sound of my voice. So of course they need garden signs! They need everything their little hearts desire (and obviously some things they don't really care about, like garden signs). You guessed it, they're incredibly spoiled. 


Russell, our Chihuahua, LOVES strawberries. Strawberries make him go, what we call 'Chi-Crazy'. That love is followed closely by his love of corn anything - kernel, cob,  husk, stalk... even the root. Everything. Also ice cream, but what dog DOESN'T love ice cream? Actually, Russell is the reason I decided to plant a strawberry patch in the first place, so that he could have fresh strawberries whenever the fancy strikes him. Easy choice, Russell shall claim the strawberry patch!


Luna, believe it or not, thoroughly enjoys weeding the garden in the warmer months. She trods through, chomping on weeds, eating some, pulling some out and dropping them. It's quite a sight to behold. She also really enjoys green beans, sugar snap peas, carrots, and cabbage. I declare Luna shall reign over the vegetable garden!


Chester is the youngest and least set in his ways. While he doesn't have a particular passion for sunflowers, he just doesn't seem like an herb garden kind of guy. Herbs are much too serious. Sunflowers it is! Also, knowing him and knowing how carefree he is, I think he an the sunflowers will get along just fine. For some reason, small dogs seem to really enjoy taking on large things so I'm really hoping to see him attempt to take down a 12 foot sunflower or two. He's a Chihuahua/Dachsund mix, I'm pretty sure both of those breeds would attack a lion if they ever got the chance. Such mighty little warriors!


Supplies Needed
Piece of Wood
Acrylic Paint (Indoor or Outdoor)
Brushes
Small Sanding Block
Wax


I happened to have three 'wooden' craft plaques taking up space in our spare room. I sanded them enough to smooth out the previous paint. Unfortunately the only craft paint I had was indoor acrylic paint. Hmmm, didn't want to go to all that work to have the color fade in the sun, or worse - wash away in the rain! A light bulb went off in my head, I have a ton of spray on clear coating. Being bored and itching to do something crafty, I decided to risk it.

First things first, if you want to give any sign a worn feel, there must be 'older' paint showing through underneath. Even though the plaques already had old paint underneath them, it would take a few years to start showing through. No thanks. So grab a dark color (I chose black) and paint around the edge of the wood. I go about 1/2 inch into the part I'm going to get artistic on and all around the sides. Let dry. Using wax (I actually used a Scentsy cube because it was handy, but a candle, or actual beeswax will do) and mark where you want paint to come through. I marked all around the edge and into the sign portion - get messy with it but remember whatever you put wax on, the next layer of paint will not stick to. 

Now, put on a few layers of whatever base paint you choose. I used Plaid Apple Barrel's Light Ivy Green. Let dry, then start sanding! Make sure to get wherever you spread the wax, and even sand some of the base paint if you like. 

I'm a big fan of free hand painting because, well, I don't play by the rules! But seriously, I'm just too lazy to use a stencil or print anything out and mess with modge podge. I use a trusty ole' pencil and an eraser to draw out what I'm going to paint. It takes some practice getting everything centered, but it works for me. After you've drawn everything on, get to painting! Be creative, mix colors, use different brushes. I got frisky and used the fancy fanned brush for the carrot tops and I must admit, they turned out great!

Once dry, use a clear, protective SPRAY paint to add several layers to the front, back and sides. I sprayed on about three layers just to be safe. I don't advise using a clear coat that you have to brush on, as it may smear the indoor acrylic paint.

Attach to a garden stake and proudly display your work of art in your (or your dogs) garden! Luna let's Chester slide because he can't read yet. Oh, to be a young pup in a garden on a sunny day.


Pineapple Wine


My husband loves pineapple. We both love wine, particularly my homemade wine. A pineapple wine was inevitable. I must admit, this wine isn't on my top five list of favorite wines. Granted, it is still wine and still very enjoyable. That my friends is the VERY important part. The problem? It's not as pineapple-y as I thought it would be. I have a hunch that has a lot to do with the tannin that I added. You can choose to leave this ingredient out if you like, as I will the next time I make this. Practice makes perfect!
.
Pineapple Wine


makes just under 5 gallons


18 (12oz) cans frozen pineapple concentrate, thawed
10 c. White Granulated Sugar
3 tsp. Acid Blend
3 tsp. Pectic Enzyme
1 1/2 tsp. Tannin
6 Campden Tablets, crushed
1 pkg Wine Yeast


Mix all ingredients EXCEPT wine yeast in primary fermentor. Specific gravity should be between 1.092-1.099, if below add sugar as necessary. Cover primary. After 24 hours, add yeast. Cover primary and attach airlock.
When ferment is complete (specific gravity has dropped to 1.000 - about 3 weeks) siphon into clean secondary. To aid clearing, siphon every two weeks for the next two months or until wine is clear. Bottle. Can be enjoyed immediately or aged to mellow.

Formula for wine alcohol percentage:
(Starting SG - Ending SG)/0.8 = Alcohol Percentage!


*If preferred slightly sweetened, add 1/2 tsp. Stabilizer per gallon, followed by 1/2 c. sugar per gallon.


Saturday, April 27, 2013

Peach Raspberry Wine


A simple semi-dry wine from juice concentrate - perfect for summer sipping!

Peach Raspberry Blush Wine

makes 6 gallons or 28 (750ml) bottles

9 (12oz) cans Raspberry White Grape concentrate, thawed
9 (12oz) cans Peach White Grape concentrate, thawed
10 c. White Granulated Sugar
6 tsp. Acid Blend
6 tsp. Yeast Nutrient
6 Campden Tablets, crushed
3 tsp. Pectic Enzyme
1 pkg Wine Yeast (I used Red Star Cote des Blanc)

Mix all ingredients EXCEPT wine yeast in primary fermentor. Specific gravity should be between 1.092-1.099, if below add sugar as necessary. Cover primary. After 24 hours, add yeast. Cover primary and attach airlock.


When ferment is complete (specific gravity has dropped to 1.000 - about 3 weeks) siphon into clean secondary. To aid clearing, siphon every two weeks for the next two months or until wine is clear. Bottle. Can be enjoyed immediately or aged to mellow.


*If preferred slightly sweetened, add 1/2 tsp. Stabilizer per gallon, followed by 1/2 c. sugar per gallon.


Formula for wine alcohol percentage:

(Starting SG - Ending SG)/0.8 = Alcohol Percentage!