Sunday, December 8, 2013

Creamy Cinnamon Hot Chocolate

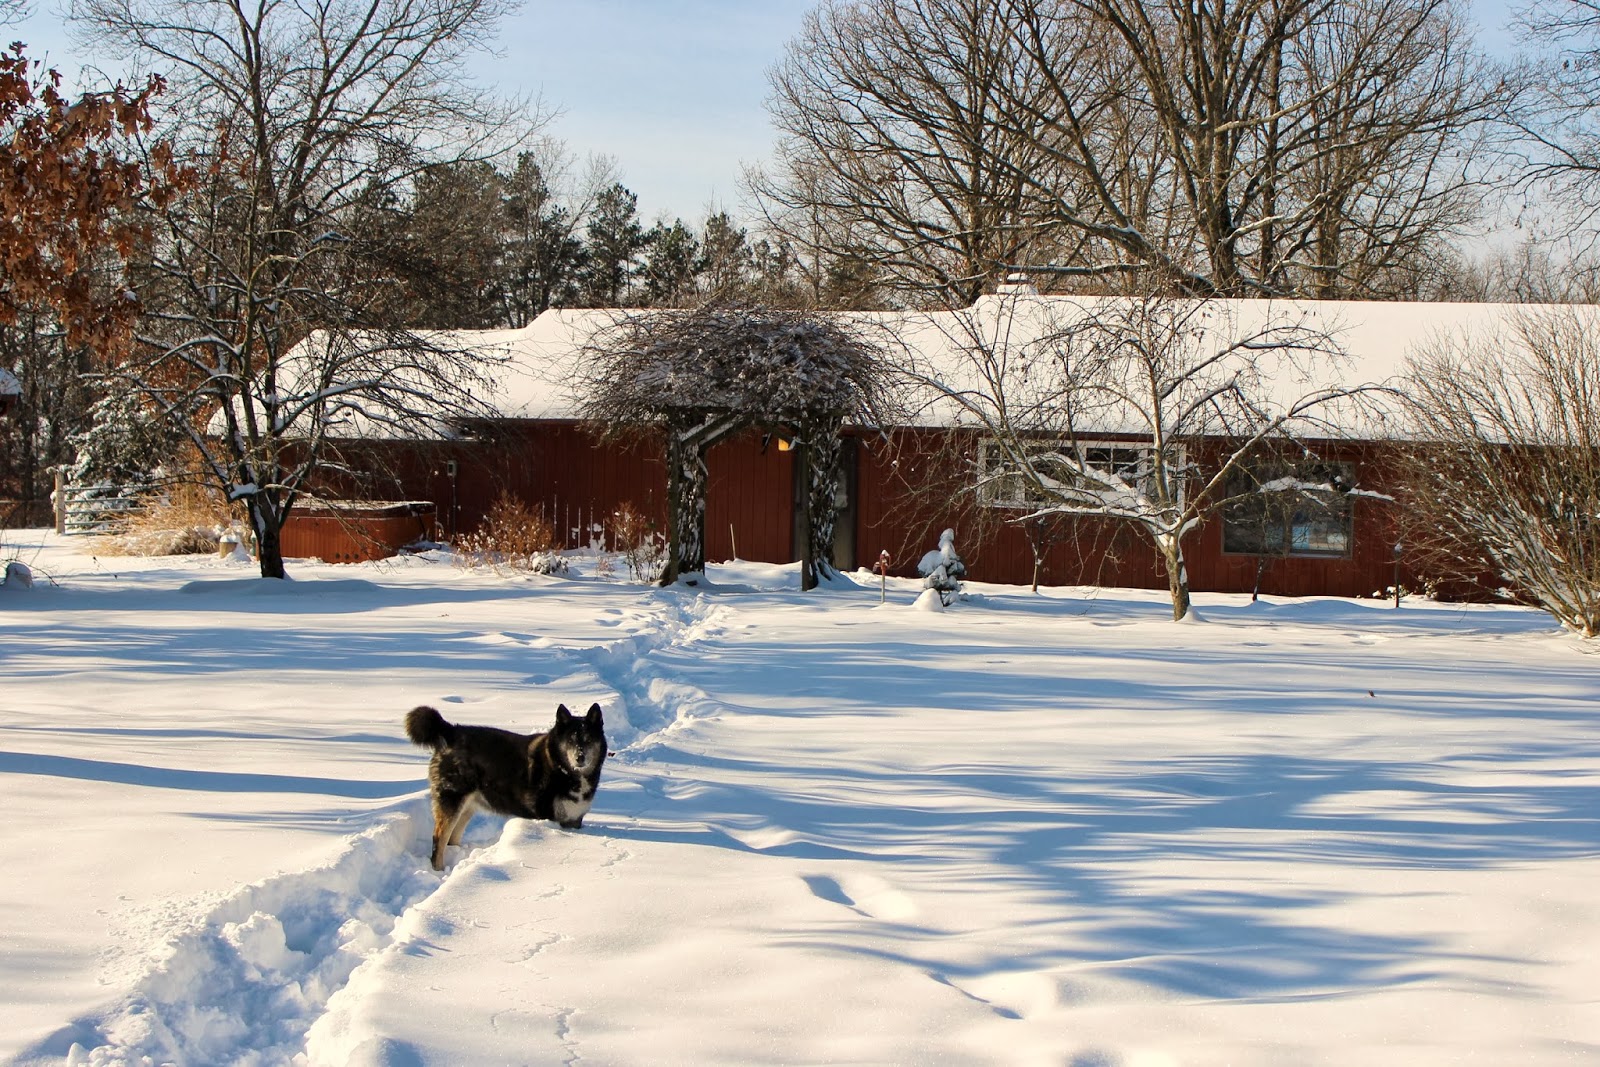
We have so much snow here in Southeastern Missouri. Country snow is different than town snow. Being a newbie country dweller, this is the first time I've truly experienced snowfall in the sticks. In town, the streets are a mess; the snow banked on the sides, grey and brown from dirt and exhaust. Even after two days, the snow out here is still so pure and fresh. 


It was a wonderful sight, the lofty flakes floating down to rest on evergreen branches. Our pond is entirely frozen over thanks to the intense temperature drop over the last week. A big fluffy layer of snow has collected on top. I'd love to try ice skating in the future, but the fear of somehow slicing my fingers off in a tumble might just be enough to keep me from attempting that. For now, I'll just enjoy the beautiful scenery.  


Luna is part husky. I think she's the ONLY one enjoying the freezing temps here at the farm - the little dogs certainly aren't. The Chi-Doxie Gang prefer to be in the warm blanketed lap of luxury, indoors. And I prefer to be that lap, while simultaneously enjoying a mug of toasty hot chocolate. BUT, the chickens need tending to, and neither hell, nor high water (or snow) will keep me from making sure my girls are comfortable in their coop.


Creamy Cinnamon Hot Chocolate

makes 5 cups 

4 C. Milk
1/2 C. Water
1/3 C. Cocoa Powder
1/3 C. Sugar
1/2 C. Mini Marshmallows
3 Cinnamon Sticks
Pinch of Salt

In a medium saucepan, whisk together milk, water, cocoa powder, sugar, salt, and cinnamon sticks. Bring to a gentle simmer over medium heat, stirring continuously. Add marshmallows. Keep over medium heat until marshmallows are melted. Serve in a large mug with extra marshmallows and a sprinkle of cinnamon.

Thursday, December 5, 2013

Dark Chocolate Strawberry Sauce

Good day to you! I haven't canned anything in roughly two months. Life has been hectic. Ya know how life can do that pesky thing it does where you're so busy all the time that when you finally go to bed at night you just kinda collapse, pass out, and wake up in a puddle of drool? I'm there right now. Painting, taking care of a zoo, laundry, work, etc., oh yeah and the swiftly approaching HOLIDAY. Can you believe its almost Christmas already??

Anywho, the weekend before last I bought five fresh pineapple with the intention of making pineapple jam. This morning I took them out of the cabinet and gasped in horror - lots and lots of mold. I guess leaving fresh fruit in a dark cabinet for over a week will do that. So I grabbed my canning bible, The Ball Book of Home Preserving, and found a recipe for Chocolate Raspberry Sundae topper that I've been wanting to try. Except I didn't have any raspberries. BUT, I did have plenty of strawberries! 

The end result of this adaptation is DIVINE. This sauce would be delectable on ice cream, pancakes, waffles, fruit, as a cheesecake topping, and uh pretty much anywhere else that you can think of. As always, I use Ball Low Sugar Pectin and reduce the amount of sugar to one third that the original recipe calls for. It created a perfect balance of sweet, and tart. 

This sauce would make a fantastic gift for the upcoming holidays!


Dark Chocolate Strawberry Sauce

yields 6 half-pints

4 1/2 C. Pureed Strawberries
1/2 C. Water
1/2 C. Sifted Unsweetened Dark Cocoa Powder
1 Pkg. (OR 3 Tbsp) Ball Low Sugar Pectin 
2 1/4 C. White Sugar
4 Tbsp Lemon Juice
1/4 tsp Butter (to reduce foaming)

Prepare jars and lids. Combine strawberries, water, lemon juice, and butter in a large pot. In a small bowl, mix cocoa powder and pectin. Whisk cocoa powder/pectin mixture into the strawberry/lemon mixture. Bring to a boil. Add sugar all at once. Whisk until thoroughly combined. Bring back to a boil, and boil hard for one minute. Remove from heat. Ladle hot sauce into jars leaving 1/4 inch headspace, remove air bubbles, and add more sauce if necessary. Attach lid and band. Process jars for 10 minutes. Turn off heat, and let jars sit in canner for an additional 5 minutes. Remove, cool, and store.

Wednesday, December 4, 2013

Farm Photo Roundup

Part of the barn lean-to, and the back of the house. I love walking back to the house from the chicken coop. Fresh air, and pockets full of eggs. Ahh.

There are a handful of these trees in the yard. I'm not sure what kind of tree it is, but the birds really enjoy them!
 
Our new baby, Dotty! We adopted her from our local animal shelter last week. She, her mate, and all five of her puppies were surrendered to the shelter after their mom passed away. Having lost my own mother just four months ago, I sympathized with the shivering little girl in the cage, and decided I wanted to give her the best home possible. Yesterday, this delicate little purebred lap dog CHASED CHICKENS. I think that makes her an official farm dog. 

Fresh eggs. Nothing makes me happier than my morning walk to collect the eggs. Beautiful, perfect little presents every morning from my sassy girls. 

Juju, our youngest, and only female cat. She's such a lovable little girl. She isn't prejudice of species, age, or attitude. She snuggles, and steals hearts... and occasionally attempts to hatch chicken eggs.

Our very first foster dog, Marley, came home with us last week when we adopted Dotty. We've wanted to foster pets for a long time. We want to help ease the transition from shelter life to home life. Does that mean lots of paper towels, extensive use of the swiffer mop, breaking up sassy dog snarls, eight potty breaks a day, and tons of patience? Maybe. But its worth every single second of hassle, just so I can see the happy wag of Marley's Schnauzer tail nub. It's only been a week, and while I'm exhausted, but I'm in love with fostering.

Sassafras pecking around the yard. Those cluck wild hens.

Monday, December 2, 2013

Simple Beef Stroganoff


'Round here, we love beef stroganoff. Noodles? Good. Butter? Good. Beef? Goooood. If you've watched the episode of Friends where Rachel makes a disgusting jam/meat trifle and Joey eats the entire thing, you knew where I was going with that. This dish is quick and easy to prepare after a long day. Who wants to stand in the kitchen for an hour after getting home, taking care of dogs, chickens, house work, etc? Not I! Whip up this tasty pot of comfort food in no time and have it on the dinner table for your family to enjoy on a chilly weeknight. 

Simple Beef Stroganoff

1 lb Ground Beef or Ground Steak
1 Large Onion, diced
1/4 C. Butter
3 Garlic Cloves, minced
1 Can of Mushrooms
2 Tbsp. Flour
Salt & Pepper to taste (I use around 1 tsp each)
1 Can Cream of Chicken Soup
1 C. Sour Cream
1 C. Milk
Package of Egg Noodles, cooked and drained

Toss butter, onion, and garlic in a sauce pan. Sauté until onions are tender. Add ground beef. Cook until beef is done, drain fat. Add in flour, salt, pepper, and mushrooms. Cook on medium heat for five minutes. Stir in cream of chicken soup, simmer for an additional five minutes. Mix in sour cream, then slowly add milk, stirring to combine. Combine with egg noodles, and voila! 


Thursday, November 21, 2013

$5 Decorative Pillows


First of all, I made each entire pillow (form and cover) for LESS THAN $5 EACH. Score!

Pillows are the easiest way to update a space, be it the living room, or bedroom. Even better, they're possibly the most inexpensive way to do so, especially if you make your own pillows. Pillow envelope covers are a great beginner project, and a breeze for both intermediate and experienced sewers. Have you priced decorative pillows at Target recently? Its a little outrageous. Twenty five dollars for a tiny be-jeweled (uncomfortable) pillow? ....Yeeeeah, I'll make my own.  All you need is a pillow form, and cute fabric. Bam, instant couch face lift! A detailed pillow envelope cover tutorial can be found here.

Nesting Box Curtains


Nesting box curtains aren't as frivolous as they may seem. Not only do curtains add adorable charm to your coop, they add much needed privacy for your girls. If you keep chickens, you know they do NOT like to be bothered in their nesting boxes. I get some very sassy clucks if I disturb my girls during their morning routine!


Materials Needed:

- 2 9''x13'' panels of fabric (per box)
- thread color of your choice
- staple gun and staples for fastening to nesting boxes

The nesting boxes in our coop measure 1ft x 1ft. You may need to adjust the sizes of your curtains if your boxes are much bigger, or just reduce the amount of overlap. 

Sew a 1/2 inch edge on each panel. You can iron the folded edge before sewing, or be lazy like myself, and fold the edge over as you sew. Once both panels have a sewn 1/2 inch edge, overlap the panels lengthwise by two inches, and sew together across the top. I used a staple gun to attach the curtains to our nesting boxes. When you need to wash the curtains, just pop the staples out (and throw away, don't leave them in the coop!), wash, dry, and re-attach. 

Sunday, October 27, 2013

Pin-Up & Pilot Costume


Last night was our local Eagles Club Halloween Party. I've been waiting for an excuse to dress up since I officially became 'too old' to trick 'r' treat. We're not much for the bar scene so other than our club, my husband and I don't go out much. I'd rather stay home and talk to my dogs, and chickens than hang out with most other people my own age. His classic rock cover-band was booked early last month to play at the Eagles for a Halloween Party. Right away, I set to work planning our costumes. YAY!

Several people have told me I have a certain 'look' about me reminiscent of the WWII era... maybe its the winged eyeliner I typically sport, who knows. Regardless, I take it as a huge compliment! Women in the 40's were so classic and beautiful. Nowadays, we're getting less class, and more people like Miley. Yuck.

This costume was so much fun to wear, and actually very easy to put together. You just need some odds and ends that you may have in your closet/makeup bag. IF your husband or boyfriend has an olive green jumpsuit, GREAT, on the off chance that he doesn't (like mine), they are available at army surplus store, thrift stores, and sites like Amazon.

Pin-Up Costume
- Halter Style Dress
- Rhinestone or Pearl Jewelry (I found a necklace and earring set for $10 at Wal-Mart)
- Red Pumps (and Ibuprofen for wearing said pumps all night)
- Victory Rolls (this tutorial will help!)
- Red Lipstick
- Liquid Eyeliner
- Fake Eyelashes, optional
- Flower for your Hair (I hot glued an old fake rose to a hair clip, super simple)
- Red Nails

Pilot Costume
- Olive Jumpsuit
- Aviator Sunglasses
- Pilot Wing Pin (found one on Amazon for $9)

Thursday, October 24, 2013

Mason Jar Soap Dispenser

Since I started canning over the summer, I've become obsessed with mason jar everything. I've replaced the cups in my kitchen with pint mason jars, use pint and a half jars as vases, I have mason jar wall art, I store pasta and flour in giant gallon sized mason jars.... you get the idea. Whilst perusing the aisles of Target, searching for new bathroom items (couldn't find anything I liked), my husband had the bright idea that I should try to make things out of mason jars for the bathroom as well. That man really is a genius sometimes. I plan on using mason jars as toothbrush, q-tip, and cotton ball holders alongside this beautiful mason jar soap dispenser. And of course one will go in the kitchen! Doesn't get much more country than that, eh?


Materials Needed
Pint Mason Jar
Soap Pump (I used a plastic pump from a $1 bottle of hand soap)
Nail
Hammer
Pliers
Strong Water Resistant Adhesive (I used a type of Gorilla Glue)
Rubber Band (for glue curing purposes)

Remove the soap pump and rinse the residual soap from it. Mark the center of the lid. Using your nail and hammer, tap little holes into the lid, opening the space with the pliers as you go, until you have a big enough hole so that the pump fits in snugly. Apply glue to the part of the plastic pump base that will connect with the mason jar lid, situate lid and pump onto jar, and secure with a rubber band for 24 hours (or as long as the glue instructs). Voila! 

Pumpkin Dip

Looking for an easy treat to take to fall parties? Bam, here it is! This popular recipe has been circulating around Pinterest ever since I joined a few years ago - and for good reason, it's amazing! If you plop it into a mini pie pumpkin with a couple sticks of cinnamon, you'll get some pretty serious praise. I know this from experience. The original recipe can be found here.


Pumpkin Dip

2 c. pureed pumpkin (canned or home processed)
1 (5oz) box vanilla pudding (just the powder, don't make it!)
1 (16oz) tub of cool whip
1/2 Tbsp. pumpkin pie spice
1 Tbsp. cinnamon
1 small pumpkin

Mix first five ingredients in a container. Chill. In the meantime, carve that pumpkin up! Sprinkle with cinnamon and garnish with cinnamon sticks if desired. Serve with apple slices, ginger snaps, vanilla wafers, graham crackers, or literally anything your heart desires (though I would advise against dipping steak in it). I attached the top to the side of my pumpkin using a toothpick. Hope you enjoy this recipe!

Wednesday, October 23, 2013

Molasses Cookies, and a Great Book


This book. I have been waiting for this book for MONTHS. It's been torture. I finally received it last week via UPS, and immediately sat down with a cup of peppermint tea to submerse myself in it. I finished it the next day - it was that good. AND, the last few pages of the book are filled with some of her favorite recipes. I knew I just had to try one that day.

I've been an avid fan of Chickens in the Road since 2010. I discovered the site whilst researching homemade Christmas decorations. This woman has been the inspiration for the farm life I want to live. She pretty much rocks. She keeps cows, chickens, donkeys, horses, and goats. Her goats love her molasses cookies , as now do I! They are moist, chewy, and perfectly molasses-y. And dipped in milk? Fo-get about it!


Molasses Cookies

1 1/2 cups butter, softened
1 3/4 cups sugar
2 eggs
3/4 cup molasses
4 teaspoons baking soda
2 teaspoons cinnamon
1 1/2 teaspoons ginger
1 teaspoon nutmeg
1/2 teaspoon ground cloves
1 1/2 teaspoons salt
4 cups flour

Cream butter and sugar. Stir in eggs and molasses. Add soda, cinnamon, ginger, nutmeg, cloves, and salt. Stir to combine. Stir in flour. Spoon dough onto waxed paper and roll into logs for slicing. Wrap and chill. Slice or form dough into 1-inch balls and roll in sugar. Place on a greased cookie sheet. Sprinkle with sugar. Bake at 375-degrees for 10-12 minutes.

Sweet Cider Apple Butter

In the middle of sewing a bag one afternoon, an unexpected vehicle pulled in the drive. It's my father-in-law. He hops out and starts stacking near-bursting bags onto the back porch. They're all full of apples. What a pleasant surprise! I dumped them all in a laundry basket for sorting, and stared in awe at their beauty.


Right away I knew where these apples and I were headed - apple butter city. I loved apple butter as a kid, and haven't had any in years. Where to turn? Where does the best apple butter recipe hide in waiting? In classic fashion, the Ball Book of Home Preservation didn't let me down. I've given away several jars of this apple butter and I've gotten RAVE reviews on it - some even saying its the best apple butter they've EVER had. That's a pretty big compliment for a novice canner if ya ask me. Of course, I was merely the vessel of the time tested awesomeness of my always spot on canning bible. 


It took me three days and a ton of elbow grease to get through all of those gorgeous apples. Thank heavens I had so many wonderful furry assistants! I ended up with thirty pints of apple butter, and a house, driveway, and yard that smelled of sweet, spiced, appley goodness. Uh, can you say awesome Christmas gifts? :)

Hope you enjoy it!


Sweet Cider Apple Butter

makes 10 half pints or 5 pints

6lbs apples, peeled, cored, and chopped
2 c. apple cider
3 c. granulated sugar
1 1/2 tsp. cinnamon
1 1/2 tsp. ground cloves

Combine apples and apple cider in a large stainless steel saucepan. Bring to a boil over medium-high heat. Reduce heat and boil gently, stirring occasionally, until apples are soft, about 30 minutes. Transfer apple mixture to a food mill or a food processor fitted with a metal blade, working in batches, and purée just until a uniform texture is achieved. Do not liquefy. Measure 12 cups of apple purée. Combine apple purée, sugar, cinnamon, and cloves in a clean large stainless steel saucepan. Stir until sugar dissolves. Bring to a boil over medium-high heat, stirring frequently. Reduce heat and boil gently, stirring frequently, until mixture thickens and holds its shape on a spoon (about 45 minutes).  Prepare boiling water canner. Heat jars and lids in simmering water until ready for use. Do not boil. Set bands aside. Ladle hot butter into hot jars leaving 1/4 inch headspace. Remove air bubbles. Wipe rim. Center lid on jar. Apply band until fit is fingertip tight. Process jars in a boiling water canner for 10 minutes, adjusting for altitude. Turn burner off, remove lid, and let sit in water bath for an additional 5 minutes. Remove, cool, label, and store.

Tuesday, July 23, 2013

Summer Fresh Tomato Pie

Nothing better than a garden fresh tomato, eh? Believe it or not, I just came to realize this last summer. Ever since I can remember I've hated tomatoes. I stopped trying to like them sometime in my late childhood and have avoided them at all costs since. Last summer, something changed. Ever since I grew my very first tomato in my own garden, I fell in love. I incorporate them into dishes whenever I can. A tomato hanging on the vine, warmed by the afternoon sun, and ripened to juicy perfection. You can't beat that. 

This recipe is not my own and was taken from a favorite site of mine. I saw it and knew I just had to try it. Hands down, a new favorite in this household. It sorta reminded me of a pizza made with very fresh ingredients. Vine ripened tomatoes and garden fresh basil. Mmhmm. An excellent weeknight dinner for a warm summer night.  


Summer Fresh Tomato Pie

2 C. Flour
1/2 tsp. Salt
1 tsp. Sugar
2 sticks Butter
1/4 C. Ice Water
3 Large Ripe Tomatoes
Handful of Fresh Basil Leaves
2 C. Shredded Cheese of your choice (Mozzarella, Cheddar, Provolone, etc)
Salt and Pepper to taste
Cherry Tomatoes and a Sprig of Basil to garnish, optional

Combine flour, salt, sugar and butter in food processor. Pulse until blended. Add ice water in slow steady stream pulsing just until dough holds together, about 30 seconds. Flatten dough into disc, wrap in plastic and refrigerate at least one hour.

Preheat oven to 450 degrees. Roll out dough and pat onto bottom and sides of tart pan. Bake crust for five minutes, then remove from oven and reduce heat to 400 degrees.

Arrange tomato slices over crust, sprinkle with basil. Mix cheese and mayo in small bowl, salt and pepper to taste. Spread evenly over the tomatoes and basil. Bake pie 30 minutes or until top is browned and bubbly.  Remove from oven and garnish with sliced cherry tomatoes and a sprig of basil.

Garlic Dill Cucumber Spears

Bumper crop is a good term for the cucumbers in my garden this year, though that may not even cover it. I've been a cucumber pickling maniac the last few weeks. I pick armfuls of pickling cucumbers every other day. It's insane. A good insane, but insane none the less. I'm very grateful. After all, I planted a garden hoping to get a lot of good canning experience this summer and to stock my cabinets full of colorful jars of fruits and vegetables. 

I've made several batches of cucumber spears. I've tried a few different recipes I found in the Ball Book of Complete Home Preserving. None really did it for me as I'm not a fan of even slightly sweetened pickles and it seems most dill pickle recipes contain sugar. So I tried the recipe for the Dilly Beans I love so much. Bingo! This one is mine and my families favorite. Vinegar, salt, garlic, and dill - the basic ingredients necessary to make one heck of a tasty pickle to accompany your favorite sandwich. This afternoon I enjoyed them alongside a fresh-egg and avocado salad sandwich. A perfect lunch if ya ask me!

This same recipe can be used to make Garlic Dill Cucumber Sandwich Slices. Instead of spears, slice into 1/4 inch slices and pack tightly into jars.

Garlic Dill Cucumber Spears

makes 8 pints

8 lbs 4-6 inch Pickling Cucumbers, cut lengthwise into spears
4 C. White Vinegar
4 C. Water
4 T. Pickling Salt
8 Cloves Garlic
4 tsp. Dill Seed
32 Peppercorns
1 tsp. Pickle Crisp

Prepare jars, bands, and lids. Combine salt, vinegar, and water in a large sauce pan. Bring to boil. To each jar add 1/2 tsp. dill seed, 1 garlic clove (I split mine lengthwise to release more flavor), 4 whole peppercorns, and 1/8 tsp. of Pickle Crisp, then pack in cucumber spears. Ladle hot pickling liquid into each jar, leaving 1/2 inch headspace. Remove air bubbles, add more pickling liquid if necessary, wipe rim of jar, and affix lid. Process jars for 15 minutes. Turn off heat and let sit in canner for additional 5 minutes before removing. Cool, label and store.

Blackberry Basil Jam

My goal in picking nine pounds of blackberries of course was jam, but I knew I wouldn't want to make three batches of standard blackberry jam. Don't get me wrong, blackberry jam is divine and it seems to be a favorite of everyone I know - my dad could eat a whole jar in one sitting. I like to experiment with food, and blackberry would be good with just about anything. I checked my favorite blog to see if the author had a creative blackberry jam recipe I could try. This woman never lets me down. She's my hero; I hope to be like her someday.


Blackberry Basil Jam

makes 7 half-pints

5 C. Crushed Blackberries
1 C. Whole Basil Leaves
2 Tbsp. Lemon Juice
2 1/4 C. Sugar
1 pkg. OR 3 Tbsp. Ball Low-Sugar Powdered Fruit Pectin
1/4 tsp. Butter or Margarine (to reduce foaming)

Prepare jars, and lids. Finely chop the basil leaves. Combine blackberries, basil, butter, and lemon juice in a 6- or 8-quart saucepan. Gradually stir in pectin. Bring mixture to a full rolling boil that can not be stirred down, over high heat, stirring constantly. Add entire measure of sugar, stirring to dissolve. Return mixture to a full rolling boil. Boil hard 1 minute, stirring constantly. Remove from heat. Ladle hot jam into hot jars leaving 1/4 inch headspace. Wipe rim. Center lid on jar. Apply band until fit is fingertip tight. Process in a boiling water canner for 10 minutes. Remove lid and let stand in canner for additional 5 minutes. Remove jars, cool, and store.

Blackberry Jam and a Canning Fiesta

Jordan and I went blackberry picking over the weekend. Blackberry season had just opened in the orchard we visited. At first I didn't see too may ripe berries and got rather discouraged. While walking through the rows of under ripe berries a couple of girls that work at the orchard walked past me, carrying cartons full of ripe blackberries. They pointed me in the right direction. Jackpot. 


We ended up with almost nine pounds of juicy blackberries. There were definitely more ready for the picking but the temperatures were sizzling on Saturday and the thirty minutes we were out there were a little rough. We cooled down with an apple cider slushie from the orchard general store, had a nice afternoon chat with a couple of goats in the orchard, had a stand-off with a very scary turkey, and headed home to start on the jam. 

This jam has been adapted from the Ball Book of Home Preservation. 


Blackberry Jam

makes 7 half pints

5 C. Crushed Blackberries
2 Tbsp. Lemon Juice
2 1/4 C. Sugar
1 pkg. OR 3 Tbsp. Ball Low-Sugar Powdered Fruit Pectin
1/4 tsp. Butter or Margarine (to reduce foaming)

Prepare jars, and lids. Combine blackberries, butter, and lemon juice in a 6- or 8-quart saucepan. Gradually stir in pectin. Bring mixture to a full rolling boil that can not be stirred down, over high heat, stirring constantly. Add entire measure of sugar, stirring to dissolve. Return mixture to a full rolling boil. Boil hard 1 minute, stirring constantly. Remove from heat. Ladle hot jam into hot jars leaving 1/4 inch headspace. Wipe rim. Center lid on jar. Apply band until fit is fingertip tight. Process in a boiling water canner for 10 minutes. Remove lid and let stand in canner for additional 5 minutes. Remove jars, cool, and store.


I didn't just stop at jam, oh no! My garden cucumbers have been out of control. I'm canning 8 pints of pickles every two to three days! This year I also discovered my love for dilly beans. I've frozen about ten pounds of green beans from the garden since they began producing, so the two pounds I picked the day before blackberry picking were definitely going towards more dilly beans. Crunch, crunch. Yum. They are amazing. I could easily eat a whole jar in one sitting.


I ended up with nineteen half-pints of various types of blackberry jam, eight pints of cucumber pickles, and four pints of dilly beans. Someday, I'll be a pro, making ten batches of pasta sauce in a single day. For now, I'm a proud novice! 

Apple Pie Jam

Warm apple pie. Yum. Though I must admit, I've never actually made apple pie. I've never made any kind of pie, really. I love apple pie, so I'm not really sure what the hold up is. Perhaps it's another one of those daunting tasks like canning seemed to be. I need to just dive in head first and make a pie! For now, this jam will more than suffice. Of all the jams I've made in the past few months (which has been a TON), this jam is my favorite so far. Stay posted though, I seem to have a new favorite every week. I can't help it, homemade jam is da bomb!

This recipe was adapted from the Mom's Apple Pie in a Jar in the Ball Complete Book of Home Preserving. 


Apple Pie Jam

makes 5-6 half pints

6 C. Finely Chopped Apples
1 Lemon - grated zest and juice
1 1/3 C. Water
2 1/3 C. Sugar
1 T. Apple Pie Spice
1 pkg OR 3 Tbsp. Ball Low Sugar Powdered Pectin

Prepare canner, jars, and lids. In a large, deep stainless steel saucepan, combine apples, lemon zest, lemon juice, and water. Bring to a boil over high heat, stirring frequently. Reduce heat and boil gently, stirring occasionally, until apples begin to soften, about 10 minutes. Whisk in pectin. Bring mixture to a full rolling boil that can not be stirred down, over high heat, stirring constantly. Add entire measure of sugar, stirring to dissolve. Return mixture to a full rolling boil. Boil hard 1 minute, stirring constantly. Remove from heat. Ladle hot jam into hot jars leaving 1/4 inch headspace. Wipe rim. Center lid on jar. Apply band until fit is fingertip tight. Process in a boiling water canner for 10 minutes. Turn off heat, remove lid and let stand in canner for additional 5 minutes. Remove jars, cool, and store.

Tuesday, July 9, 2013

Dill Sandwich Slices

This recipe was taken from the Ball Complete Book of Home Preserving, though I omitted the pickling spice and used white vinegar in place of cider vinegar. The cider vinegar will make a darker brine and darker pickles.

I planted FOURTEEN cucumber plants this year. What was I thinking?! I had intended to plant ten (which still probably would have been too many), but because of multiple plants in a few of the cucumber seedlings I purchased I ended up with more, and I just didn't have the heart to throw them away. So I planted the extra near my porch. Those four extra plants have crept their way up the trellis and are taking over. I must say though, I've learned something because of it - make use of whatever space you have! The idea to use our back porch trellis to grow food hadn't crossed my mind before trying to find a home for the little cukes. Next year (if we're still in this house) I plan on utilizing the space for green beans as well. That will clear up more garden space for non-climbing plants. Perhaps I'll try something new!


Dill Sandwich Slices

makes about 5 pints - makes plenty of brine for 8 pints if you have plenty cucumbers and spices available

3 Tbsp. Pickling Spice
4 C. Cider Vinegar or White Vinegar
4 C. Water
3/4 C. Granulated Sugar
1/2 C. Pickling or Canning Salt
5 Bay Leaves
5 Cloves Garlic
2 1/2 tsp. Mustard Seed
2 1/2 tsp. Dill Seed
13 1/2 C. Sliced Trimmed Pickling Cucumbers

Prepare jars, bands, and lids. Tie Pickling spice in a square of cheesecloth, creating a spice bag. Combine salt, vinegar, sugar, water, and spice bag in a large sauce pan. Bring to boil, reduce heat, and boil gently for 15 minutes. To each jar add 1/2 tsp. Dill Seed (or 1 Head of Dill), 1/2 tsp. Mustard Seed, 1 Garlic Clove, and one Bay Leaf. Pack cucumber slices into hot jars. Ladle hot pickling liquid into each jar, leaving 1/2 inch headspace. Remove air bubbles, add more pickling liquid if necessary, wipe rim of jar, and affix lid. Process jars for 10 minutes. Turn off heat and let sit in canner for additional 5 minutes before removing. Cool, label and store. 

Monday, July 8, 2013

Storing Your Tea Collection

Last Christmas my husband got me one of my favorite presents to date: he subscribed me to a tea-of-the-month club. To some that may seem dull or silly, but actually it was incredibly thoughtful. My husband knows his wife well. He's known about my tea obsession since day one, or maybe day five, I probably didn't bring that up on the first date for fear of scaring him off.

Ever since that first neat package of tea arrived in the mail, my tea collection has steadily (and rapidly) grown. I currently have over thirty types of herbal, green, black, white, chai, and specialty blend loose leaf teas. The sealed envelopes the tea comes in keeps it mighty fresh but isn't exactly aesthetically pleasing. So a few weeks ago I moved all of my tea into appropriately sized mason jars, added labels that specify not only the type of tea but also how many teaspoons it takes to make the perfect cup of delicious and soothing tea. 


Thursday, June 20, 2013

Blueberry Sauce

This recipe is from the Ball Complete Book of Home Preserving, aka my canning bible. This stuff is superb on pancakes, waffles, ice cream, and even in sweet tea! Have you ever had blueberry sweet tea? It's divine. Give it a try and thank me later.


Blueberry Sauce

makes six half-pint jars

7 C. Whole Blueberries
2 3/4 C. Unsweetened Apple Juice (or water)
1 Tbsp. Grated Lemon Zest
1 1/4 C. Granulated Sugar
2/3 C. Corn Syrup
1/4 C. Lemon Juice

Prepare canner, jars, and lids. Crush blueberries. Combine crushed blueberries, juice (or water), and lemon zest. Bring to a gentle boil over medium heat. While maintaining a constant but gentle boil, add sugar, stirring until completely dissolved. Continue boiling gently while stirring in corn syrup and lemon juice. Bring to a full rolling boil over high heat, stirring constantly. Boil hard for 15 minutes. Ladle hot sauce into hot jars, leaving 1/4 inch headspace, if necessary. Wipe rim, center lid on jar, and apply band to fingertip tightness. Process in a boiling water canner for 10 minutes. Turn off heat, remove lid and let stand in canner for additional 5 minutes. Remove jars, cool, and store.

Tuesday, June 18, 2013

Fresh Peach Jam


makes 5 half-pints

4 C. Finely Diced/Crushed Peaches
1 1/2 C. Sugar
2 T. Lemon Juice
1/4 Tsp. Butter or Margarine (to keep foaming down)
1 Pkg Ball Low Sugar Pectin OR 3 Tbsp.

Prepare jars, and lids. Combine peaches, butter, and lemon juice in a large pot. Whisk in pectin. Bring mixture to a full rolling boil that can not be stirred down, over high heat, stirring constantly. Add entire measure of sugar, stirring to dissolve. Return mixture to a full rolling boil. Boil hard 1 minute, stirring constantly. Remove from heat. Ladle hot jam into hot jars leaving 1/4 inch headspace. Wipe rim. Center lid on jar. Apply band until fit is fingertip tight. Process in a boiling water canner for 10 minutes. Turn off heat, remove lid and let stand in canner for additional 5 minutes. Remove jars, cool, and store.