Monday, May 5, 2014

Rhubarb Strawberry Jam


It's gorgeous outside. A little on the hot side dare I say, but I'm not complaining - I'll take eighty five degrees over thirty degrees any day.

We put the majority of the garden in over the last two weekends. We had planned on having a 60'x100' garden, but due to this being our first spring here and not knowing the quality of the ground, we ended up having to move the garden from the original plotted spot to a slightly smaller area in the pasture. The people that lived here before us kept horses, so the pasture closest to the barn is nice and fertilized. We put in seventy-two heirloom tomatoes, thirty heirloom peppers, a fifty foot row of summer squash, a fifty foot row of green beans, and a fifty food row of cucumbers. We use t-posts, and twine to support the tomatoes, and climbing vines. It's worked wonders for us so far. Sometime in the next week I need to plant the pumpkins, winter squash, watermelon, eggplant, corn, and garden berries. This will be my first year growing garden berries (garden huckleberries, and ground cherries), and I'm pretty excited to grow something that will give me fruit the first year. Eventually I'll add on to our little orchard, but I'm so darn impatient when it comes to fruit trees. I like quick results!

As a young 'un, I remember my granny and grandpa growing rhubarb in their garden. As an adult, I faintly remembered the smell of the freshly picked rhubarb, but the taste has been long gone. From what I gather, my granny was a pro when it came to strawberry rhubarb pies. She passed away when I was eight, and that was the last I saw or heard of rhubarb until this spring. I kinda forgot about it to be honest. I love gardening and growing new things, but never thought about planting my own rhubarb. I'm always more focused on tomatoes, cucumbers, peppers, and green beans when spring rolls around. You can imagine how delightfully surprised I was to find a rhubarb plant emerging from the ground when spring finally sprung a few weeks ago. Not wanting that beautiful red stalked veggie/fruit to go to waste, I knew it'd be my first canning project of the year.

Once I cut the stalks, and got a whiff of that sweet, apple-y, citrus-y aroma, I was totally bummed that I just had the one plant - though I should consider myself lucky! I ended up with three cups of chopped rhubarb, and knew that'd be just enough for a batch of tasty jam. Though the Ball Book of Home Preserving has a rhubarb BBQ sauce that I can't wait to try, should someone be sweet enough to throw some more rhubarb my way.


This recipe is adapted from the Ball Book of Home Preserving as I prefer using Ball's Low Sugar Pectin.

Rhubarb Strawberry Jam
makes 4 to 5 half pints

3 C. Chopped Rhubarb
3 C. Chopped Strawberries
2 1/2 C. Granulated Sugar
1/3 C. Lemon Juice
1/4 tsp. Butter
1 pkg. or 3 Tbsp. Ball Low Sugar Pectin

Prepare jars, and lids. Combine rhubarb, strawberries, butter, and lemon juice in a 6- or 8-quart saucepan. Gradually stir in pectin. Over high heat, bring mixture to a full rolling boil that can not be stirred down, stirring constantly. Add entire measure of sugar, stirring to dissolve. Return mixture to a full rolling boil. Boil hard 1 minute. Remove from heat. Ladle hot jam into hot jars leaving 1/4 inch headspace. Wipe rim. Center lid on jar. Apply band until fit is fingertip tight. Process in a boiling water canner for 10 minutes. Remove lid and let stand in canner for additional 5 minutes. Remove jars, cool, and store.

It's so good. I can't believe I lost so many precious years with rhubarb. Never again, sweet, delicious, rhubarb.... never again.

Wednesday, April 9, 2014

Farm In Bloom

Last week I moved the ducks down to the pond. And they haven't left. Seriously, they are refusing to go back to the coop. I didn't have much time to spend with them while they were 'growing up' (they're two months old now, and pretty much fully grown, its insane), so they aren't the tamest of creatures. I mean, they know I'm the woman that brings them food, but they're not tripping over themselves to snuggle in my lap. Which isn't a biggie, I enjoy having ducks on the pond so we'll always have a handful, but I doubt we'll be raising a ton of them over the years. If they start gettin' busy makin' babies (fingers crossed!), we've talked about processing ducks for meat in the future. But lets not talk about all that business... instead, look at how majestic they look floating on the pond! And who can blame them for not wanting to leave? They have a peaceful little pond all to themselves, complete with a mountain view. Lucky ducks.

Fishies! Feed them, and they will come. They remind me of the dogs when they hear me open something up that has a wrapper. We have several large catfish in here as well. I actually had to pull a frighteningly large, dead one out of the pond last week. My guess is that he froze during the winter, and died. He was pretty decomposed. Smelled great.

Our fruit trees are blooming. It seems that the whole farm is blooming really. Things are coming to life, and its just gorgeous. Nature leaves me in awe every spring. Each seemingly more beautiful than the last. I was going to add to our little orchard this spring, but I'm gonna wait and see what we have first. Based on the shape of the tree, and the pink bloom, I think this first one is a cherry tree. Fingers crossed!

I discovered a random patch of rhubarb in the yard. Its in the strangest place too, back by the chicken coop. I know nothing about growing rhubarb, so my plan is to just check on it every once in a while and hope for the best. Strawberry rhubarb jam, perhaps?

Hope you laid a pretty egg for me today Clover.
Clover: "So you're the egg thief!? How dare you!"

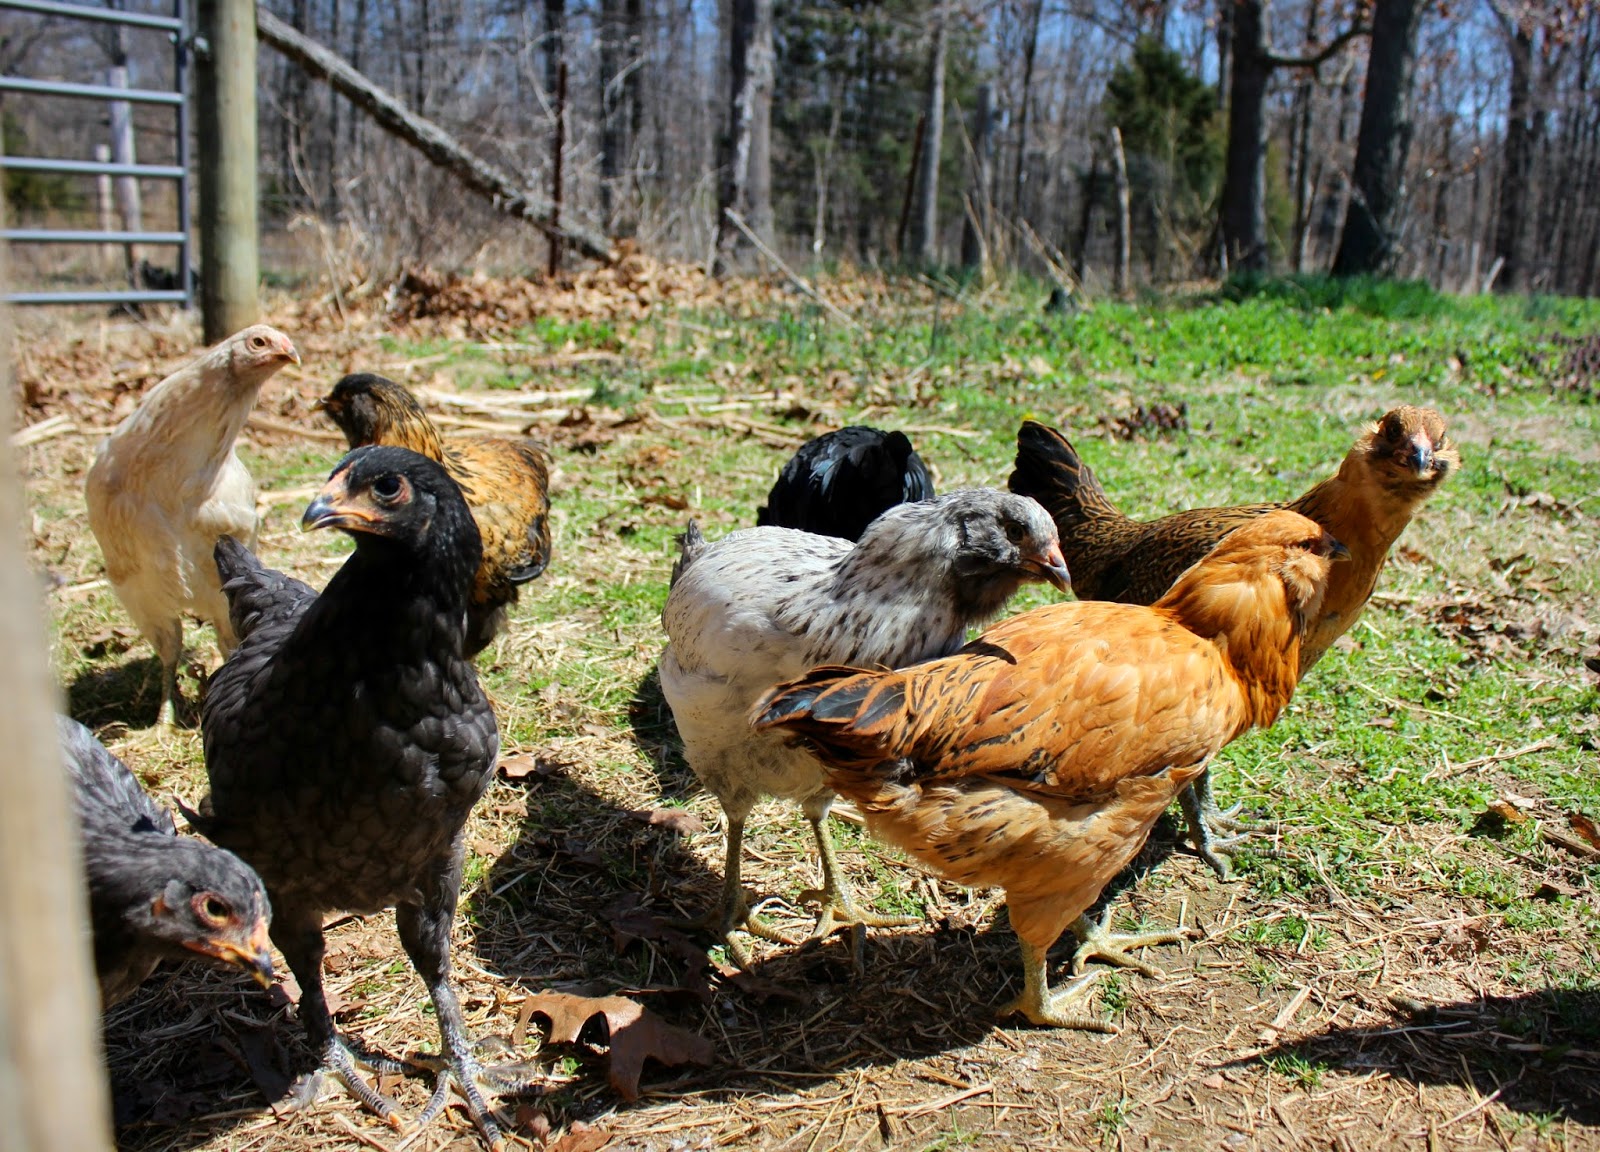
The little ones are ten weeks old now. They're getting so big, and sassy.

My pride and joy: my tomato plants. After a few years of unsuccessful attempts at growing plants from seed, this year I finally got it right. And you know what the secret is? Fluorescent lamps. If you live in a colder climate in which you have to start seeds indoors in late February/Early March, you must have grow lights to have strong, healthy plants. I fought it for so long because I didn't want to spend the money, but boy, oh boy was it worth it. I just moved them out to the greenhouse yesterday because the temps have been in the high fifteens/low sixties. These twenty beauties, and their fifty-two tomato sisters will be going in the ground in two weeks, and need to be slowly hardened off to the outdoors.

Thank sweet baby jesus, my peas are finally coming up. Three weeks ago I planted a packet each of snow peas, sugar snap peas, and shell peas in the ground. The next day it snowed. The weather went from sunny, mid sixties, to overcast and mid forties for the following week and a half. So I was quite annoyed, and worried my little peas would rot in the ground. This row of sprouting peas I found over the weekend was a sight for sore eyes. I'm relieved!

I've never been much of a flower kinda girl, but apparently the folks who used to live here really enjoyed them. We have daffodils, hyacinth, and rose bushes all over the yard. They're quite beautiful, they smell heavenly, and just might convert me over to the flower loving dark side. I'm dying to see what other surprises are waiting to spring up all over our property. I'm crossing my fingers for some honeysuckle, elderberry, and wild blackberry bushes. I hear wild wines calling my name.

Tuesday, April 8, 2014

Two Ingredient Energy Bars


It's HERE, it's finally here! What you may ask? GARDENING SEASON. I've been waiting all winter for this very time of year. If you're a gardener, goat keeper, or chicken keeper like myself - you need all the energy you can get. These bars are not only energizing thanks to the natural sugars in the dried fruits, but also filling thanks to the healthy fat in the nuts. These bars would also be excellent to take along on a hike, foraging for wild edibles such as dandelions, or mushrooms, or whilst simply enjoying nature. They're super simple to make - just TWO ingredients, and you probably have them in your pantry right now. So get to work whipping these together, then get outside and enjoy the sunshine.

Two Ingredient Energy Bars

1 C. Dried Fruit (Prunes, Apricots, Cherries, Blueberries, etc)
1 C. Nuts/Seeds (Walnuts, Pistachios, Sunflower Seeds, etc)

Combine dried fruit, and nuts in a food processor. I used one cup of prunes, and a 1 cup combination of pistachios, and walnuts. Feel free to play around with this recipe by combining different fruits, and nuts. You can also double, or triple this recipe. As long as there are equal parts of fruit, and nuts, ya can't go wrong. Process for a few minutes, until nuts break down, and mixture becomes sticky.

Dump out onto wax paper, form into a ball, and flatten out to your preference using your hands, or a rolling pin. I used my hands 'cuz I'm lazy like that. You can make the bars as thick, or thin as you like.

Refrigerate for thirty minutes. Cut into bars, and enjoy. All this fruity, nutty, healthy goodness - they are delicious, no joke. I would imagine these bars can be kept in the fridge for quite a long time, given that they are made of foods that have a long shelf life themselves. The bars can also be frozen for longer storage if you want to make up a super-sized batch.

Thursday, March 13, 2014

Honey Wheat Poppyseed Bagels


Yesterday on our way to work, my husband and I stopped to grab a couple of breakfast sandwiches from McD's. I know I know, its not healthy, but we were hungry and in a hurry so it got the job done. While eating his steak breakfast bagel (who eats steak for breakfast?? oh yeah, my husband), he professed his love for bagels. I never buy bagels at the store 'cuz I'm a toast kinda girl, but I thought, why haven't I made bagels yet? They seems simple enough, and as everyone knows, homemade is always best. I whipped up this recipe, and I ain't lookin' back. Homemade bagels are DA BOMB. These bagels are slightly sweetened from the honey, but you could totally leave the honey out of the recipe and use these as sandwich buns. In fact, that's a dandy idea for dinner tomorrow!

Honey Wheat Poppyseed Bagels

1 tsp. Fast Rise Yeast
1 1/2 C. Warm Water
1 tsp. Salt
1/4 C. Honey
2 1/2 C. All Purpose Flour
1 C. Whole Wheat Flour
2 tsp. Poppyseed
1 Egg
1 Tbsp. Water

In a large bowl, combine yeast, salt, honey, and water. Let sit for five minutes to allow the yeast to bloom, and become frothy. Begin adding flour, one cup at a time, stirring until the dough becomes too difficult to easily stir. Add more flour as necessary, and begin kneading. The flour is approximate, you may require a little more, or a little less. The dough is done once its smooth, elastic, and not sticky to the touch. Place dough in a greased bowl, and cover with saran wrap. Let rise for one hour, or until doubled in size. Once doubled, sprinkle dough with a little flour, and punch down. Re-cover with saran wrap, and let rise for another twenty minutes.

Put a half full pot of water on the stove to boil. Preheat oven to 350 degrees Fahrenheit. Divide dough into eight pieces. Roll dough into balls, and poke hole through each ball with your finger, gently stretching until the hole in the center is around a half inch. Gently drop bagels into boiling water, and boil two minutes on each side. Remove bagels from boiling water with a slotted spoon, and place onto a greased cookie sheet. Whisk egg, and water. Lightly brush each bagel with egg mixture. Bake for thirty minutes. Cool on a wire rack, and enjoy with some cream cheese, and jam! :)

Tuesday, March 11, 2014

Fear the Chicken

I am Daisy, the giant Barred Rock. Fear me, tiny human!

Wait, is my microphone on?

Monday, March 10, 2014

Almost Spring

While Saturday wasn't exactly picture perfect weather - it was chilly, and rainy - Sunday was perfect! Yesterday was a warm, sunny, almost spring day. Spring is only TEN DAYS away, afterall. We spent the entire day outside, doing chores, and watching the animals enjoy the weather.

First of all, let me say that if you ever decide to get ducklings, do it when its warm enough to put them outside soon after you bring them home. The mess they make while indoors is insane. Holy moly. I was changing their bedding out every other day, and it was STILL a wet, poopy mess at all times inside their brooder. They were soaking through their wooden brooder box, and that moisture got onto the floor, which in turn jacked up a spot in our new flooring. I tried brooding them in the bath tub, and within twenty minutes, they had poop flung four feet up the shower walls. Frankly I don't know how they accomplished such a feat - they're still pretty small! I was impressed, but out of options on where to brood them indoors.

I did a little research on Back Yard Chickens to find out when I could move them outside. Most people insisted on waiting for temps in the 80's during the day, and 60's at night before putting ducklings outside, and to not even think about it until they're twelve weeks old.... No freakin' way could I wait that long. I couldn't accept that, so I kept digging, and found a few people that said they put theirs outside with a heat lamp even when it was only 20 degrees at night. That was all I needed to move their stinky, but cute little butts outside!

Last weekend my husband and I blocked off a small portion of our 10'x20' chicken coop with chicken wire for the little girls to live in while the big girls get used to the idea of having new birds in their territory. Adding small chickens in with big chickens is a recipe for disaster. Chickens take their pecking order VERY seriously, and it can result in death for the little ones. We put the ducklings in the 'nursery' coop, with their food, water, and a heat lamp. And ya know what? They did great! In all seriousness, they're happier outside than they were in their brooder. They're cleaner from having more room to run around instead of walking back and forth through poop in their small brooder. In the last four days since I've put them outside, their feather growth rate has doubled. They've started QUACKING at four weeks old - is that normal? Either way, its ADORABLE.

Inside our house, our seven week old chicks were still in their brooder. I knew once we moved the eleven chicks out to the nursery coop with the ducklings, space would be a little cramped. It would be a while before I could move the chicks, and ducklings into the big coop, and I didn't want to keep them cooped up that whole time. So we threw together a little 10'x10' yard for the little ones to play in, eat bugs, and soak up some sunshine. They can fly, just not over the fence yet.

And they did lots of playing, eating, and roosting on feet. Winnifred is an Easter Egger, with the puffiest cheeks of all the girls. Easter Eggers are known for their puffy cheeks - its kind of a big deal for her.
Grizelda is the only non buff and black EE that we have right now. She has green eyes, blue and white feathers, with a few random smudges of brown. That's the fun of ordering Easter Eggers - you never know what you're gonna get!


A sample picture from Grizelda's glamour shots.

When I ordered my first batch of chicks in January, I had never heard of Cochins. They looked fluffy, and friendly though, so I added two Blue Cochins to my order. I can't say enough good things about them. They are so sweet, and so, so SO soft. They are literally little balls of snuggly fluff.

See, I told you they were doing great as outside ducklings!

Clockwise from left: Blanche (Leghorn), Esme (OE), Hazel (EE), Morning Glory (Blue Cochin), and Grizelda (EE).

In my defense, the water was clean :)

Our Black Copper Marans, Nutmeg, and one of the Olive Eggers, Andora the black eyed devil chick (no really, she's a bully!)

After giving the chicks some recess time in the yard, we started on wood for next winter. My husband cut, and chopped, and I carried it up to the barn. There's security knowing that no matter what kind of crazy, power outage inducing weather we have next winter, we'll always have heat from our wood stove.

We finished off the day by spending time with the goat girls. I took a bunch of pictures of them running, and jumping. In classic fashion, they were all blurry. I'm still getting the hang of this camera. And here's the thing about playful goats: they ain't got time for pictures.

Unless they think you have gingersnaps, then they're all up in your face.

And even if you claim that you don't have gingersnaps, they'll climb right up your legs to check your pockets.... just to be sure.

And just when I thought we could retire back to the house and get some rest, and relaxation in, I'm greeted with this. Mr. Attitude: 'And where have you been??'

Monday, February 24, 2014

Lucky They Let Us Live Here

Sure, we pay all the bills, and do all the chores, but let's face it - it's really up to them whether we get to live here. The dogs, the cats, the goats, and especially the chickens, they KNOW they're in control. Today, they've decided to take over the front porch. They're chickens, and they do whatever the 'cluck' they want. Hens gone wild.


But if they know whats good for them, they'll stay out of the raspberry patch when there are actual berries in there. I've got plans for all of those raspberries, Clover! You better not eat them!

Speaking of homegrown food, there are broccoli seedlings in the greenhouse!

Remember The Quackshire Family? When it warms up, this will be their new playground. I'm dreaming of a warm summer day when we stroll outside to see six beautiful duckies floating peacefully on the pond. Hopefully one day, there will be babies following my babies. But I'm getting ahead of myself - for now, they're still covered in yellow fuzz, peeping up a storm, and making a mess in their brooder. 

My new wind chimes make beautiful music. No country home is complete without wind chimes.

The Sunday before last we cut down several trees to make posts for an enormous backyard dog-fence. On Saturday we buried the posts, and put up the fence (holy sore arms). Lucky for us we had experts on hand to oversee the project, and gobble up any unearthed worms.

Our fence! Its even more beautiful than I imagined. I'm so proud of what we made together - from cutting down trees, hauling logs from the woods up to the yard on our shoulders, to digging countless two-foot deep holes, and what do ya know? A fence! We used random scraps of wood for a make-shift door, so it's only temporary, but it works for the moment. I'm well aware that the logs won't last near as long as pressure treated lumber, but these posts were free, and I like free. I also love the look, its so rustic. The fence our goats are in right now was here when we bought the house, and it too was constructed with raw wood. It looks rather old, and is still very sturdy. If I couldn't be considered a homesteader before, I'm definitely one now!

Success!

Thursday, February 20, 2014

DIY Farm Sign Using Any Font


Our new place has tons of random pieces of wood lying around in the barn. I knew once I stacked them up that they'd be getting a few coats of paint, some distressing, and would adorn random places throughout our farm. I've made a few wooden hand painted signs before, but drawing out the lettering myself takes FOREVER. I draw it out on the sign, realize its off center, or crooked... then I have to erase all of my hard work. Total bummer. The idea struck me the other day to try something a little different, and it worked out perfectly!

Supplies Needed:
Piece of Wood, cut to size
Sawtooth Picture Hanger
Acrylic Paint (I used Indoor and sealed it with a clear coat)
Wax
Sand Paper
Clear Coat Spray Paint (I used Rustoleum)
Printer
Printer Paper
Paint Brushes
Pen

Apply a dark coat of paint only around the edges of the board, and wherever you want the dark paint to show through in the distressing. One coat should do. Once dry, coat painted edges of wood (and any other areas you painted dark) with a thin layer of wax. Apply two coats of light colored paint on entire board, drying in between. Using sandpaper, sand down edges of board, and any other wax coated areas until the darker paint shows through. Continue distressing until you get your desired effect.

Now for the exciting part - the lettering!

I downloaded a few fonts I liked, measured the piece of wood I was using, and how big of an area I wanted the lettering to cover, and printed out the words and my chicken symbol sized accordingly. To save my beloved black ink, I printed in a light pink color. Cut the words out, and place them wherever you want the wording to go on your sign. Applying pressure, trace over the words - you'll notice there will be an indent where you were tracing.

To make it easier to see when painting, outline the indent of your letters or symbols with your pen.


Finally, paint the outlined letters and symbols. I did two coats of black paint for the letters. Then finished off the entire sign with a coat of clear coat, and attached a sawtooth picture hanger to the back . How easy was that?!

Have fun making a sign for everything in your yard! :)

Tuesday, February 18, 2014

Philly Cheesesteak Pasta

Believe me when I tell you that this is one of the best dishes I've ever made IN MY LIFE. Its incredible. Seriously. I had planned on making beef stroganoff, but used up all of my cream of mushroom soup on last nights chicken and dumplings (I'll post that recipe soon). So I had ground steak, I had mushrooms, I had plenty of onions, and I had green peppers that I knew I wanted to use in tonights dinner. Hmm, what to make? Of course, philly cheesesteaks came to mind. But I wanted pasta. What a conundrum. So I did what I always do when I'm about to make something amazing - I poured myself a glass of wine, and started tossing stuff together. A dash of this. A pinch of that - and voila! Philly Cheesesteak Pasta was born. I will be making this approximately once a week for the rest of my life. My god.

\
Philly Cheeseteak Pasta
1 Tbsp. Extra Virgin Olive Oil
1 Large Onion, sliced thinly
1 Large Green Pepper, sliced thinly
1 Tsp. Seasoned Salt
1 Tsp. Garlic Powder
1/2 Tsp. Ground Black Pepper
1 Pkg White Mushroom, sliced
1 Lb. Ground Steak, or Ground Beef
1 Lb. Pasta, cooked to al dente, and drained
1/2 C. Beef Broth
1 C. Shredded Mozzarella

In a large skillet over medium-high heat, combine olive oil, onion, green pepper, season salt, garlic powder, and black pepper. Saute over medium-high heat until tender. Add sliced mushrooms. Cook an additional five minutes. Transfer to a bowl. In the same skillet, cook ground steak, or beef until done. Drain if necessary. Combine cooked veggies to ground beef. Add beef broth, and stir. Add beef/veggie mixture to cooked, and drained pasta. Add cheese. Stir until melted. Serve, and enjoy!

Saturday, February 15, 2014

We Welcome The Quackshire Family

In some very exciting, and surprise news - we have ducklings! Yesterday on our way home from work, my husband took a different, and very long route home... all to get me my last in a series of Valentines Day presents. Other women may want flowers, or jewelry for Valentines Day, but my husband knows me better. He knows that a blackberry bush, or a box of ducklings is the way to this girls heart. I'm calling them 'The Quackshire Family' until I figure out the boys from the girls. 

I've never raised ducklings before, so this will be an entirely new experience for me. I couldn't be more excited! They're SO CUTE.  

My husband and I took them into the bathroom today, laid down a towel, gave them a bowl of water, and they went WILD. How many ducklings can fit into a dog food bowl? 


After about fifteen minutes of making an absolute mess, the ducklings were flat tuckered out. We tucked them back in their brooder, and went off to do farmer business - measure for a fence! We've been here three months, and one of the absolute musts for this spring is installing a fence for the dogs. Our dogs are wanderers, and believe me, there's plenty of acreage to wander off into - over one hundred acres of woods surround our house. Not to mention the hawks, coyotes, wild dogs, and from what I've read, even mountain lions that roam/fly around these parts. The last thing I want to do is wrestle a mountain lion in the dark over a Chiweenie. Don't worry, I don't like to kill things, so if it happens I'll go easy on the mountain lion. 

Juju, and Otis had a long afternoon of eating, and pooping. They took a much needed nap. 

It's been a month or so since I've made a batch of soap. Which is crazy - I love making soap! For reasons unknown (maybe it was that second jug of coffee?) I had an unusual burst of energy for a Saturday afternoon, and started a batch of soap. Wanna learn how to make your own homemade soap? I thought so! Find my easy to follow tutorial here.

While the soap was cooking, I cracked open a jar of my favorite pickles in the whole world - my very own Garlic Dill Cucumber Pickles. Thank sweet baby jesus for canning, its a much needed reminder of the garden. Seriously winter, enough.

After I plopped the hot soap into its mold to cool, I remembered it was time to start a few more seeds! Broccoli, Cauliflower, and Lettuce this evening. Tomatoes, Peppers, and Eggplant towards the end of the month. There's a light at the end of the tunnel!

I marked my seeds with these little toothpick flags, They're not pretty, but they get the job done with black containers.

I set my soap outside to cool a little faster. What can I say? I'm impatient. Normally it takes eight hours to cool. I usually can't wait that long. I wanna slice up some beautiful bars of soap, and marvel at my handy work! Basil Mint Sage with French Green Clay on the left, and Honey Spearmint on the right. Gawgeous.

Tomorrows agenda: cut down cedar trees with the hubby to make posts for the dog fence. Chainsaw time!