
Supplies Needed
Old Paper Back Book
Hot Glue Gun and Glue Sticks
Elmer's Glue
Glitter
Scrap Book Paper
Piece of cardboard that's about 2/3 the size you want the finished project to be
Painted Wooden Letter
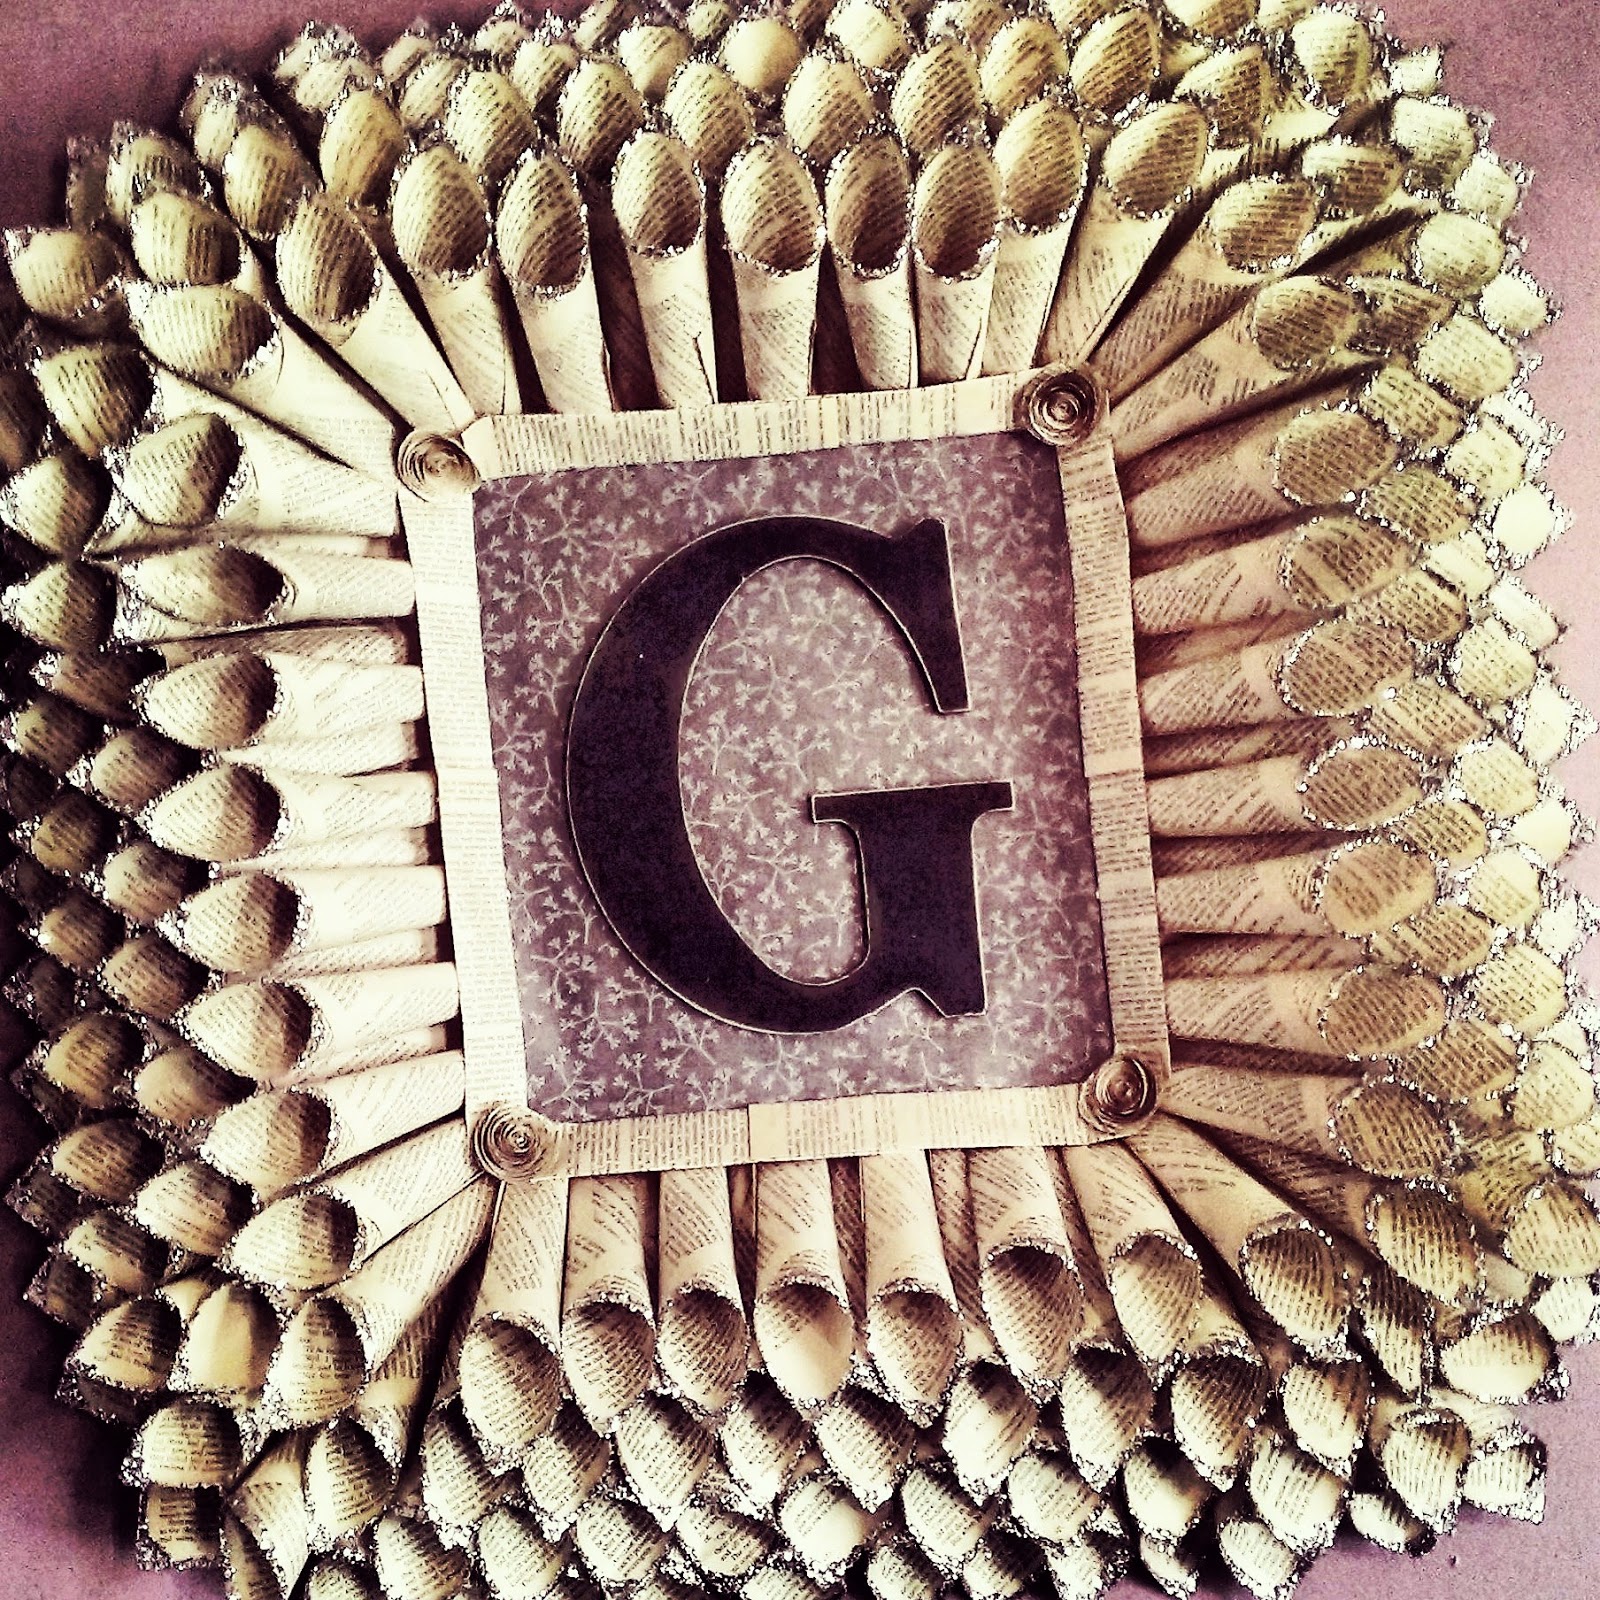
You can make as many or as few paper cones as you'd like, keeping in mind that the more you make, the fuller the finished project will look. The best way to tackle this is to do one part at a time. Make all the paper cones first. Gently remove the book pages from the book, then one at a time curling a page inward and securing with a dot of hot glue. Since you don't know exactly how many you'll need, make a bunch then move onto the glittering process. You can always make more paper cones and you will undoubtedly need to.
Pour about a quarter inch of Elmer's glue into a small and shallow bowl. Dump some glitter into another small and shallow bowl. Dip the ends of the paper cones into the glue, followed by a dip into the glitter, and set aside to dry. I recommend putting a towel down where you intend to set the cones to dry. The glue shouldn't drip but you will get glitter EVERYWHERE otherwise. Continue the process until all the cones are glittered.
Once dry, begin attaching the small end of the glittered paper cones to the cardboard backing with a dot of hot glue. Secure your back row of glittered cones about two inches from the edge of the cardboard. This will make the cones stable and less floppy when moving around. Work your way around and eventually inward. Leave about an inch distance between the glittered end of each cone. You'll need less paper cones this way, and it will still look just as full. Make more cones if necessary. Repeat the attaching process on the second layer of paper cones, but this time glue the small end of the cones in between the space you left in the first layer. Repeat all the way around until you get the fullness you like.
Once done with the paper cone portion, cut a piece of scrapbook paper to snugly fit the blank space of cardboard where your letter will go. Using Elmer's glue, secure the scrapbook paper in place. To cover the ugly spot where the scrapbook paper meets the unfinished ends of the paper cones, I folded eight book pages lengthwise, secured them closed with a few dots of hot glue, and attached them to the cardboard/paper cone end area with a few more dots of hot glue. I then made four book page rosettes to make the corners look more 'polished.'
Finally, using hot glue, secure your painted letter to the center of the project. Voila! This has been hanging in our bedroom for about five months now, and while the project doesn't appear to be losing glitter, it still magically ends up sprinkled on our nightstand. Not a lot of glitter but still glitter. We all know how impossible it is to get rid of glitter. I haven't tried it yet, but spraying the project (focusing on the glittery ends) with a spray on clear coat (such as Rustoleum or Krylon) would probably secure the glitter on there for good.
Happy glittering!
Happy glittering!
No comments:
Post a Comment