Monday, December 30, 2013

Chai Tea Soap


New to soap making? Look here.

Chai Tea Soap
9.6 oz. Olive Oil Pomace
6.4 oz. Coconut Oil
9.6 oz. Vegetable Shortening
6.4 oz. Lard
4.63 oz. Lye
12.16 oz. Distilled Water
2 oz. Chai Fragrance Oil
4 tsp. Ground Chai Tea

Chai tea can be used whole, but its best to grind it up to a course powder.

How to Make Soap


So you've decided you want to make soap, eh? Well good for you! Not only will it cut costs in the long run, but you'll also impress people with your pioneer-esque skills. Pioneers had crock pots, right?

Of all the skills I've taught myself over the past year, soap making is one of my favorites. Its almost as fun as canning. I get such a sense of accomplishment after slaving away in the kitchen all day (just kidding, it takes less than two hours), and finally slicing that first bar of soap from the loaf. A big 'ole hunk of beautiful, clean satisfaction.

This recipe has been tested by my family and approved. Its difficult for me to find a soap that I like as most of the store bought soaps leave my skin itchy afterward - but not this one! Its a very moisturizing bar, and the only soap I'll ever use.

Soap Ingredients:
9.6 oz. Olive Oil Pomace
9.6 oz. Vegetable Shortening (Crisco)
6.4 oz. Coconut Oil
6.4 oz. Lard
4.46 oz. Lye
12. 16 oz. Distilled Water

Optional Ingredients:
1-2 oz. Fragrance Oil
2-4 Tbsp. Natural Coloring (French Green Clay Powder, Bee Pollen Powder, etc)
2 Tbsp. Herbs (Spearmint Leaves, Rosemary, etc.)

Equipment Needed:
Crock Pot (Designated solely for soap making)
Stick Blender (designated solely for soap making)
Wooden Spoon (designated solely for soap making)
Digital Scale
Nitrite Gloves
Eye Protection
Glass Measuring Cup
Various Plastic Bowls
Plastic Spoon

Caution: Lye is a caustic substance. Its best to keep pets and children away from wherever you intend to work with lye, and out of the kitchen during the soap making process. Always wear gloves, and goggles when working with lye until it tests non-caustic.

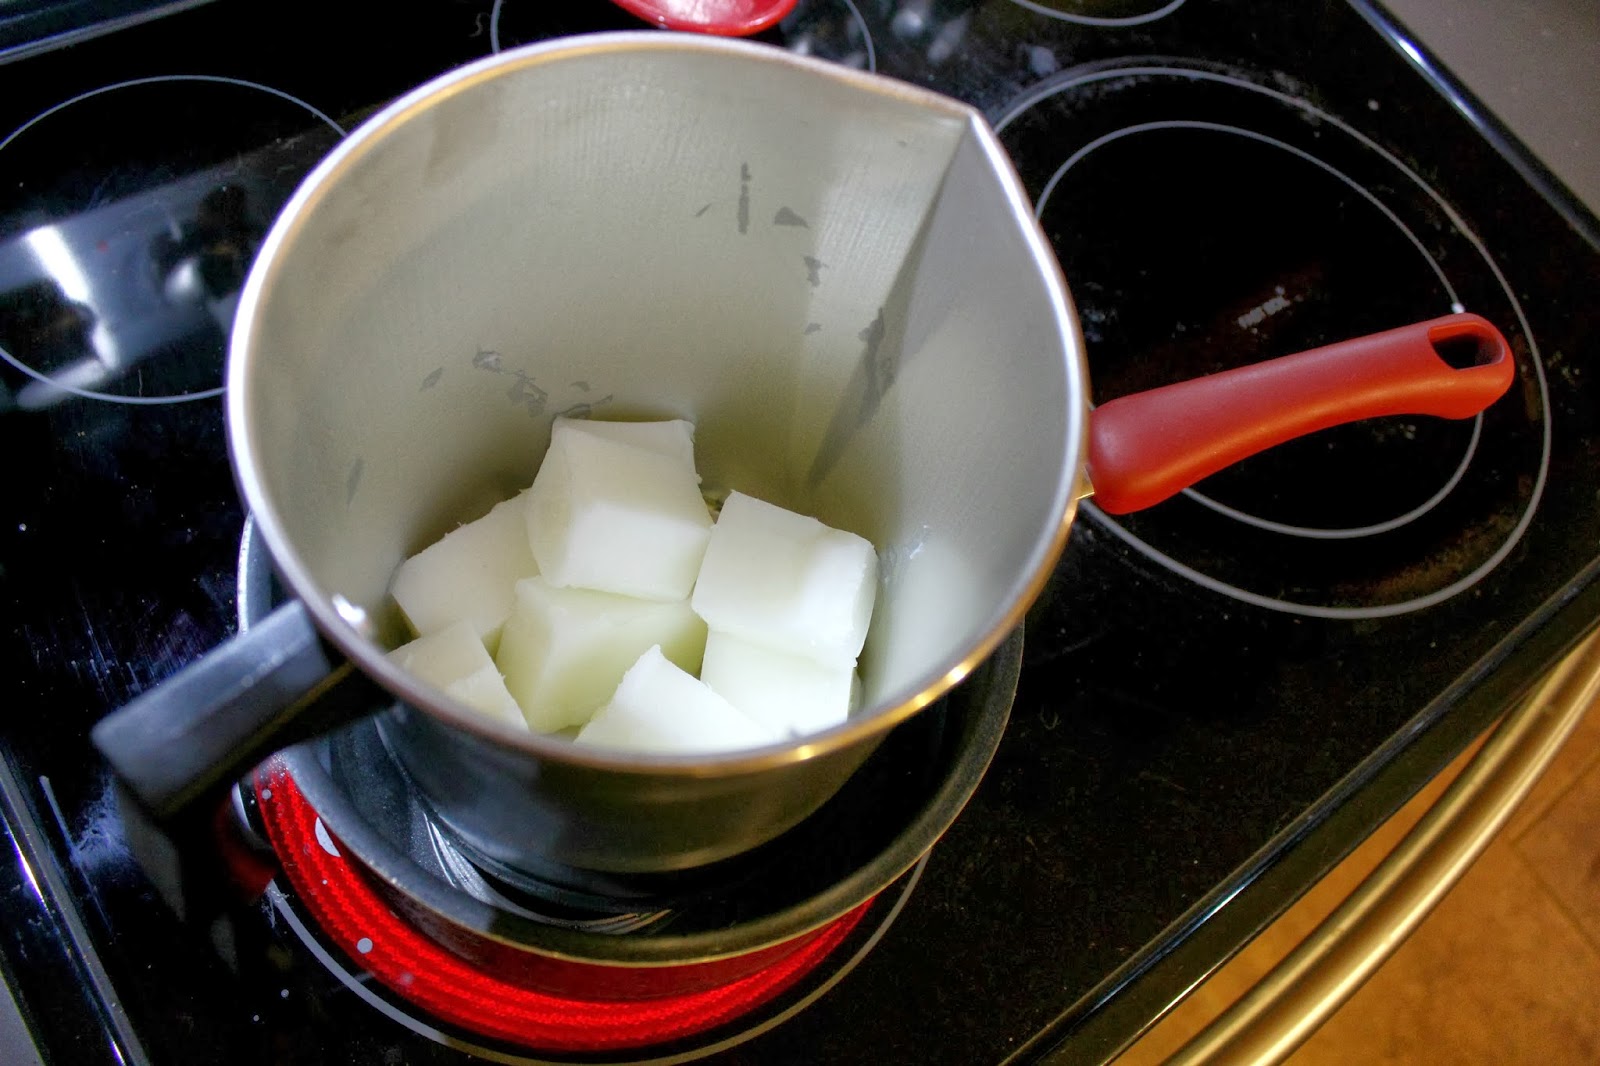
Measure out fats: Olive Oil, Coconut Oil, Vegetable Shortening, and Lard.

Dump in Crock Pot. Set to high, and cook until all the fats are melted to a liquid (20-30 minutes).

Once everything in the crock pot is melted, its time to mix the lye and water. Make sure you're wearing long sleeves, your protective gloves, and have eye protection on. This is critical, as lye can blind you if it gets into your eyes. Don't let that scare you away! Many household cleaners can cause the same damage - just be sure to take necessary precautions.

I take my lye onto the porch to measure and mix it. If you've never used lye before, it comes as tiny beads that have an immense amount of static electricity. The first time I mixed it in my kitchen and the beads went everywhere - bad news if you have children or pets. When mixing lye and water ALWAYS POUR LYE INTO WATER, NEVER WATER INTO LYE. The idea is to dilute the lye when mixing. If you pour water into lye, you'll create a concentrated substance that has the potential to spatter everywhere (i.e. eyes and skin).

Upon pouring and mixing the lye into the water, you'll notice its very cloudy, and gives off a vapor. Do not breath in the vapor, but continue mixing.

After 30-60 seconds, it will clear.

Take lye mixture inside, careful not to spill anywhere, and slowly pour into the crock pot with the melted fats. Using your stick blender, blend contents or about 5 minutes. You'll stop blending when your soap 'traces' - a term used to describe the thickening of the mixture to which a line or 'trace' is visible when the utensil is pulled through the soap. At this point, the mixture should be the consistency of a soft pudding. Place the lid on the crock pot, and cook on LOW. Stay by the crock pot as the soap cooks. The soap will expand and boil over. As it rises, stir it and place the lid back on. Keep a close eye on it.

As the soap cooks, at first it will look similar to apple sauce, then take on more of a waxy appearance. Once it looks like the picture below (about an hour of cooking), its pretty much done.

Test the soaps PH to be sure it is in fact done, and no longer caustic. The strip on the right was my first test, right after combining the materials (obviously I knew it was no where near done but wanted a picture to show for comparison). The strip on the left was taken just before removing the soap from the crock pot and shows that the soap is safe to touch.

Once done, transfer the soap from the crock pot to a plastic bowl. Let sit for a few minutes stirring occasionally. The idea is to cool the soap down as much as you can before it starts to harden. The cooler the soap is before adding the fragrance oil, the more of the scent the soap will retain. Too high of a temp when adding fragrance oil can literally wipe it out entirely leaving no smell.

Add dry additives of your choice. Stir. Add fragrance oil. Stir. Then spoon the soap into the mold of your choice. I like to be as frugal as possible and just use cardboard molds I find around the house. I've also used the bottom portion of cereal boxes with great success. Allow soap to cool at room temperature for at least 8 hours or until completely hardened.

Once it has cooled, slice into bars and its ready to use!

Mistakes I've made when making soap: 
1. Didn't watch the crock pot and the soap boiled over, leaving a gooey, chemical/fat mess all over the counter.
2. After the crock pot boiled over, I had the bright idea to leave the lid off so it wouldn't happen again. Bad idea. The soap dried out before it was able to cook into a neutralized state, and gave off wretched chemical fumes. Had to scrap the whole batch.
3. Didn't mix a dry additive well enough, and once dried the soap bars had clumps of powder in them.  
4. Too many dried herbs in my first batch. A little goes a long way.

An Unseasonably Warm Saturday

Winter in Southeastern Missouri is cold. Today for example, we're at 20 degrees F. I hate it. So when I found out that last Saturday was going to be unusually warm, we planned to spend the day outside. It was a gorgeous day, reaching the low sixties!

Unless there is a blizzard or other hazardous weather, we let our girls free range every day. I think they were enjoying the warmer weather almost as much as me.

Last year, I attempted to start my garden vegetable plants from seed by a window. A combination of cats, and drafty windows ensured that things wouldn't pan out as I had planned. This year I expressed my desire for a greenhouse, and my hubby delivered. He got me a greenhouse for Christmas and put it together on Saturday afternoon. 

Plenty of room, zippered doors on opposite ends to allow necessary airflow and extra sunlight during the warmer weather, and totally weather proof during the colder months. Its the most beautiful thing I've ever seen.

After almost a month of a frozen pond, Luna was finally able to take a dip. She's a fish at heart.

We measured and marked out the garden area. Yep, that's my husband waaaay out there. We'll be getting it tilled up, and applying fertilizer in the next couple of weeks. I can't wait!

A Chi, pondering the meaning of life. He's always way too serious.

Oh and here's a picture of Sassafras on Christmas Day. She always likes to accessorize. 

Fruit Infused Water Three Ways


I've never been a huge fan of soda. It's okay every once in a while, but its just too sweet for me to consider drinking it every day. When I would drink soda, it was usually diet because I found it to be less of a syrupy fat trap. With all the claims of diet soda causing cancer due to the sweetener in it, I promptly stopped consuming it.  Though I could drink plain 'ole water for the rest of my life and be content, its nice to mix it up once in a while.

The answer to your boring water prayers? Fruit infused water. Its all natural, you know exactly what goes in it (unlike the 'fruit flavored' waters at the store), it contains nutrients, and more importantly, its down right refreshing. I like to store my fruit water in mason jars for an easy grab and go beverage when I'm walking out the door. Be aware that the longer fruit water sits, the stronger it gets - citrus fruit such as lime and grapefruit can become quite potent and bitter after a few days.

Fruit infused water is super simple to make, and definitely doesn't require a recipe, so much as a suggestion. These three fruit waters have been tested and approved. Drink right away, or let infuse for a few hours. The great part about this water is that you can drink and keep refilling with water over the coarse of a few days to get all the usage out of that beautiful fruit that you can.

Apple Cinnamon - One sliced up apple, and two cinnamon sticks

Pineapple Lime - Half a cup of fresh pineapple chunks, and two slices of lime

Cucumber Orange - Several slices of cucumber, and three orange slices

Thursday, December 26, 2013

Lemon Cupcakes with Blackberry Basil Buttercream

Today is my husbands birthday! The young pup is finally catching up with me. The big 2-6. I'm only 26 myself, but I'm four months older than he is. It's not much of an age difference but sometimes it feels like fifteen years. I'd like to think I'm an old soul. Oh to just be turning 26 again...

Unfortunately he had to work today, but fortunately for him, that gives me plenty of time to make his favorite treats. He'll be ecstatic to come home to pizza and lemon cupcakes. Heck, I'm excited to have pizza and lemon cupcakes!


Lemon Cupcakes with Blackberry Basil Buttercream

3 C. All Purpose Flour
1/2 tsp. Salt
1 Tbsp. Baking Powder
1 C. Sweet Cream Butter, room temp
2 C. Sugar
4 Eggs
1 tsp. Vanilla Extract
Zest of Two Lemons
1 C. Whole Milk
Juice of One Lemon

Frosting:
1 C. Sweet Cream Butter
4 C. Powdered Sugar
2 Tbsp. Whole Milk
1/2 C. Blackberry Basil Jam or Blackberry Jam with 2 Tbsp. Chopped Fresh Basil

Preheat oven to 375 F. In a large bowl, cream together butter and sugar. In a medium bowl, mix flour, salt, and baking powder. Set aside. To the butter/sugar mixture, add eggs, vanilla extract, and lemon zest. Mix briefly to combine. Add in the milk, and flour mixture. Mix only until combined - do not over mix. Fill greased muffin tins 3/4 full. Bake for 15 -17 minutes or until toothpick inserted in center comes out clean. Let cupcakes cool completely. Makes roughly 20 cupcakes.

Once cupcakes are completely cool, cream together butter, powdered sugar, jam, and milk. Now frost those babies!

Sunday, December 22, 2013

Two Weeks of Green Smoothies in Twenty Minutes

Last year for Christmas, I received a NutriBullet from my hubby. I fell in love with it. Do I believe the hype that it 'extracts and unlocks' secret nutrients in fruits and veggies? No, but that had nothing to do with why I wanted it. I love green smoothies, but I'm not so fond of the texture that comes from a smoothie made in a traditional blender. Even a good run-of-the-mill blender will still leave little flecks of fruits and veggies behind. I like my smoothies blended to near juice-like perfection. Nothing kills a smoothie for me like a hunk of kale floating into my mouth when I'm expecting a smooth drink of awesome. The NutriBullet definitely fit the bill and got the job done well.

Though I love eating fruits and veggies, I don't always get my recommended daily amount. A green smoothie is a great way to pack in all of those missed-out-on daily nutrients. If your taste buds aren't too picky, almost any vegetable and fruit can be thrown into a smoothie. Green smoothies are delicious and refreshing, but different from chain restaurant and coffee house versions of smoothies which contain mostly fruit, yogurt, and sugar. Green smoothies contain 50-75% vegetables, making them less sweet but MUCH more nutritious. Natural sweeteners, such as honey, or agave nectar are great additions if you wanna sweeten things up. As I type this, I'm drinking a kale, pumpkin, carrot, and strawberry smoothie with a touch of honey. Yum.

The two days a week that I work, I leave the house at 6am. I barely have time to make coffee (which is necessary to live), so I rarely have time to make a smoothie. Chopping, portioning, and freezing the ingredients ahead of time allows you to have that good for you drink every morning. This recipe makes an excellent drink on its own, but if you have any veggies floating around in the fridge, feel free to toss an extra goodie into your green smoothie. I tried it with cucumber and it was extra refreshing.

Makes enough for two weeks worth of green smoothies, and can be doubled for a whole months worth of green nutrient-rich gold.
Green Strawberry Smoothie

1 Large Bag of Kale, washed
3 Zucchini
7 Gala Apples
2 (16 oz) Bags of Frozen Strawberries
14 Quart Freezer Bags

Wash all the produce. Peel, and half apples. Remove seeds, and place half of an apple in each bag. Add roughly one cup of loosely packed kale into each bag. Chop zucchini into one inch slices, and add roughly half a cup per bag.
Finally add 3-4 strawberries to each bag. Divvy up any leftover fruits and vegetables into each bag. Label and freeze.
Blend with one and a half cups of water until smooth.

Cucumber Dill Tea Sandwiches

When it comes to an appetizer or snack, I like simple and quick. This recipe is just that, simple, quick, and best of all inexpensive. All you need are five ingredients to make these beautiful tea sandwiches that are sure to be a hit. Fancy food without the footwork, my favorite.


Cucumber Dill Tea Sandwiches

1 Loaf of French Bread, sliced and halved
16 oz. Sour Cream
1 (1oz) pkg. Dill Dip Mix
1-2 Large Cucumbers, Peeled and Sliced (I like to use the peeler to make ribbons)
Freshly Ground Black Pepper

For best results, combine the sour cream and dill dip mix a few hours before preparing. Spread a dollop of the dill dip on each half-slice of bread, top with cucumber slices or ribbons, and finish off with a crank of freshly ground black pepper.

Easy peasy, and scrumptious!

Monday, December 16, 2013

How Does Your Garden Grow?

The sun on your face, green grass, and best of all, dirt; I miss warm weather. Like all vegetable gardeners, I get cranky and repressed when it gets cold and gloomy. My cabin fever seems a bit worse than usual this winter. Our first winter (and first coming spring) on the farm may have something to do with it. I have so many things planned for our acreage, and I want spring to be here, like, now! Alas, since I am not a wizard, and can do nothing about the cold, I spend my winter free time planning and researching homesteading ventures. 

Vegetable gardening is in my blood. My mom and dad gardened for many, many years, as did my grandparents. If I couldn't garden, I think I would just wither up and die. I love it that much. As the years go by, and with every new house we've moved into, my vegetable garden has grown. Due to renting restrictions, the garden at our first house, 8' x 8', was very small compared to what I wanted. The second house permitted a much larger garden, 20' x 30'. That garden grew plenty for us to eat over the summer, and sixty plus pounds combined of  broccoli, corn, and tomatoes to store in the deep freeze for winter. I also canned five dozen pints of pickles, two dozen pints of pickled green beans,  two dozen pints of pasta sauce, three dozen pints of salsa, and two dozen half pints of pizza sauce. It gives me a rush every time I grab packages of green beans out of the deep freeze for upcoming meals. I think, 'I grew these green beans, I blanched these green beans! It's december and they taste like they're straight from the garden!' 

Vegetable gardens don't have to be huge to be beneficial. You'd be surprised at the amount of veggies we got from our first, and tiny 8' x 8' garden. Work with what you have. This year with the space we've acquired, its gonna be 'go big or go home' for us. I'm planning a 60' x 100' garden. Do we I need that large of a vegetable garden for just two people? No. Do I want that large of a veggie garden? Absolutely! Someday I would love to sell my veggies and homemade goods at farmers markets, and that would warrant an even larger garden. For now, 60' x 100' will give me plenty of room to grow the large variety of veggies I want, as well as enough in number to provide food for the hubby and I throughout the entire winter. I'm sure our family and friends will be kind enough to take some homegrown heirloom veggies off our hands. 
Below are some of the highlights of my vegetable garden list. I just ordered these seeds, among many others, so I'll probably spend the remainder of winter staring at the packages, patiently waiting to start the seeds in the upcoming greenhouse.

Disclaimer: These photos are not mine, most were taken from Baker Creek Heirloom Seeds. 

Ananas Noire Tomato- Aren't they gorgeous?!

Blue Berries Tomato - BLUE tomatoes, people!

Costoluto Genovese Tomato

Mary Robinsons German Bi-Color Tomato

Green Zebra Tomato

Chinese Red Noodle Bean - Two foot long beans? Uh, yeah I'll take that.


Perfection Drumhead Savoy Cabbage - the leaves remind me of lace.

Dakota Black Popcorn - BLACK popcorn!

Boston Pickling Cucumber - I grew these last year and they were so prolific, and tasty!

Mexican Sour Gherkin Cucumber - I can't wait to pickle these little guys.

Blue Scotch Kale - Kale is an excellent nutrient packed veggie to add to smoothies.

Ping Tung Eggplant

Charentais Melon

Orange Glo Watermelon

Crimson Sweet Watermelon

Ground Cherry - Destined for pies, and jam.

If you haven't already, I hope this post inspires you to grow some heirlooms, too. Happy garden planning!

Wednesday, December 11, 2013

Maple Spearmint & French Green Clay Soap


I've read about from-scratch soap-making before. Not the melt, and pour soap, I'm talking the scary lye, and lard kind of soap-making. It piqued my interest, but I pushed it to the back of my mind. It sounded way to complicated, and I'd probably burn my skin off. 

Fast forward two years. Here I am, on my farm, with my new-found country homesteader confidence, and another soap making post from my favorite blogger graced my screen. I've taught myself the arts of canning, bread making, cheese making, candle making, sewing, chicken keeping, and wine making, among many other things. Not to mention many personal tribulations that have made me a stronger and more self-sufficient human being. After all that, I knew I could make soap. And as it turns out, its pretty simple. 

There are three methods that I know of for making soap:

One - Melt and pour. Purchase a pre-made block of soap, melt, and throw in your own additives. 
Two - Cold Process. Combine fats, and lye over a heat source. Stir in additives, then pour directly into the mold. Once dry, cut soap, then let 'cure' (to neutralize the lye) for several weeks.
Three - Hot Process, the method I used (and loved). Hot process and cold process start out very similar, but instead of pouring the fat/lye combination into a mold to let cure, the mixture is cooked to neutralize the lye right before your eyes. The soap is safe to use right away, though if a shape is desired, it will need to cool in a mold before cutting into bars. 

The tutorial  and base recipe I used can be found here. This recipe makes two pounds, and 8 standard sized bars. The second best part about making your own soap (first being self-sufficiency) is the cost. If purchased elsewhere, an artisan, quality ingredient soap like this might cost anywhere from $5 to $8 per bar, possibly more. This entire recipe costs around $12 to make, which equals out to ONLY $1.50 PER BAR. That's pretty amazing if ya ask me.

Maple Spearmint & French Green Clay Soap

Soap:
9.6 oz. Crisco
6.4 oz Lard
9.6 oz. Olive Oil Pomace
6.4 oz. Coconut Oil (76 degree melting point)
12.16 oz. Distilled Water
4.463 oz. Lye

Additives:
1 oz. Maple Syrup Fragrance Oil
0.5 oz Spearmint Fragrance Oil
3 Tbsp. French Green Clay Powder
2 Tbsp. Dried Spearmint

Monday, December 9, 2013

Homemade Candles

Candles are great. They make a home warm and inviting; the smell, the glow. We always have two going at opposite ends of our house. I'm a fan of candles that smell of baked goods. Don't get me wrong, I love a house filled with the smell of ACTUAL baked goods, but I can't make pies and cupcakes 24/7. A few weeks ago I decided I wanted to start making soap from scratch. When I started researching soap making suppliers, I noticed many of them also sold candle making supplies. A light bulb when off - why hadn't I thought to make homemade candles, too? So I purchased the supplies I needed for homemade soap (which I'll attempt in a few days), as well as everything I needed to start making homemade candles. They're SO easy, anyone can do it! You can build up your own candle stockpile in your favorite scents (that may be difficult to find in store bought candles), or give them as gifts. Homemade gifts are the best to give (and my personal favorite to get)!


Supplies Needed:
1 lb Candle Wax
1 oz. Fragrance Oil
1 16 oz. OR 2 8 oz. Container for the Candle
Wicks
Wax Adhesive 
Double Boiler OR a Pot, Canning Rings, and a metal container preferably with a spout (see below)

Put a dab of Tacky Wax on the bottom of the metal wick base. 

Adhere the wicks to the bottom of your chosen candle containers.

Now to melt the wax. Wax must be melted over indirect heat. If you have a double boiler, use it. If, like me, you don't have a double boiler, canning rings in the bottom of a pot will do just fine. 

Cut the wax up into chunks. The smaller, the quicker it will melt. Melt over medium heat.

Once the candle wax is melted, add the dye. The amount depends on your preferences and the scent you're using. I used Blueberry Flapjacks, and wanted a deeper blue candle so I used around 10 drops of dye. I used a medicine dropper to measure. Lastly, add the scent and immediately pour into candle containers. The longer the scented wax sits in the pot, the more of the scent 'cooks out', resulting in a weaker scented candle.

When pouring the melted wax into the containers, reserve about 1/4 of a cup or so (doesn't have to be exact, just eyeball it). As the wax cools, a reservoir will form around the wick. You'll need to re-melt the reserved wax and top the candles off so the wax will be flat all the way across when you're done. Make sure your wicks stay centered; butter knives worked for me!

Once candles have cooled and are solid (a few hours), clip wicks to 1/4" length. Use right away or store. 

I challenge you NOT to get obsessed with making your own candles. Happy candle making!